The Preface Composer sets the stage for your book with a context-rich preface. It outlines the book's origins, purpose, and the journey ahead, engaging readers and providing a seamless transition into the main content. This template crafts a compelling narrative that discusses the events and motivations behind the book, giving readers insight into its creation and what to expect. The preface is designed to be both informative and captivating, ensuring that it sets a strong foundation for the book.
Craft high quality, non fiction chapters for your book.
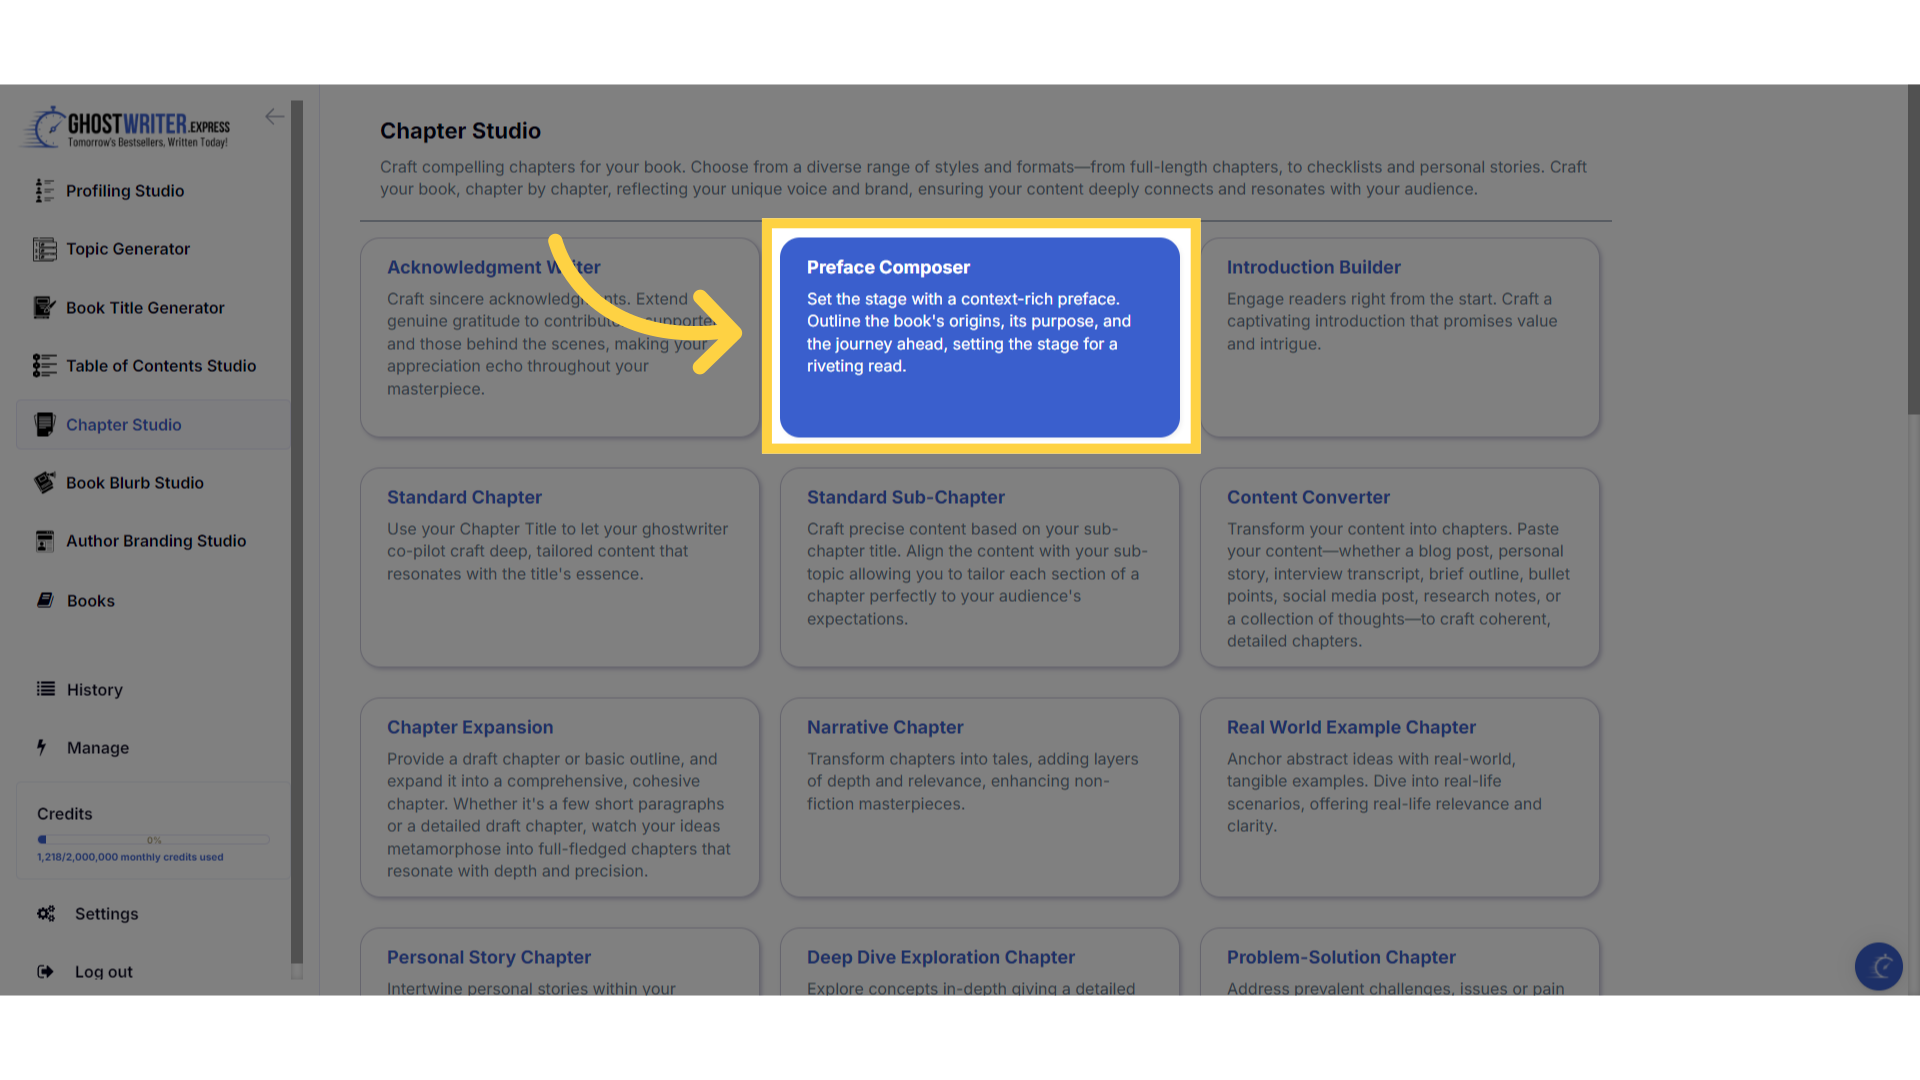
Click "Chapter Studio"
Welcome to the Chapter Studio, your ultimate A-I tool for crafting compelling chapters for your book.
)
Select "Preface Composer"
The preface composer sets the stage for your book with a context-rich preface. It outlines the book's origins, purpose, and the journey ahead, engaging readers and providing a seamless transition into the main content. This template crafts a compelling narrative that discusses the events and motivations behind the book, giving readers insight into its creation and what to expect. The preface is designed to be both informative and captivating, ensuring that it sets a strong foundation for the book.
)
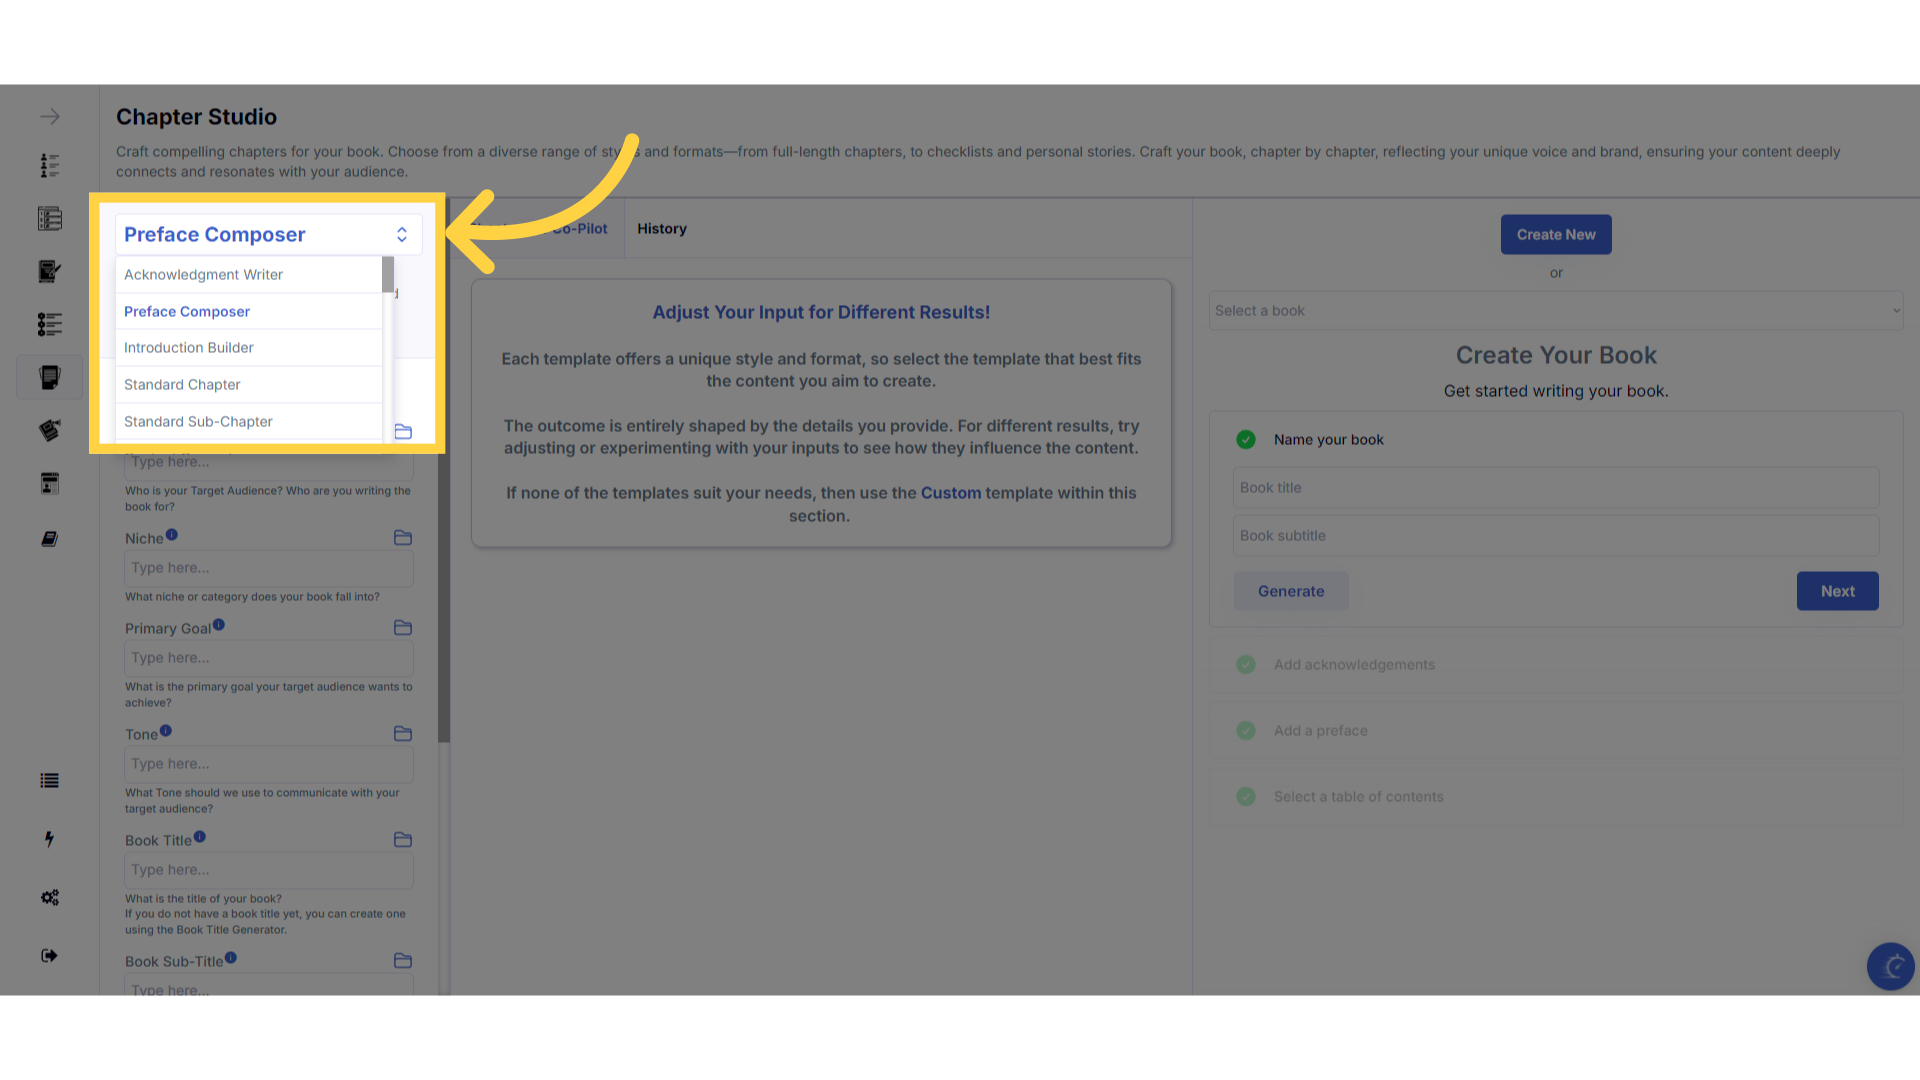
Click "Template Name" in the dropdown menu to change between the templates.
Click on the template name to open the dropdown menu, to select and change between the templates within the chapter studio.
)
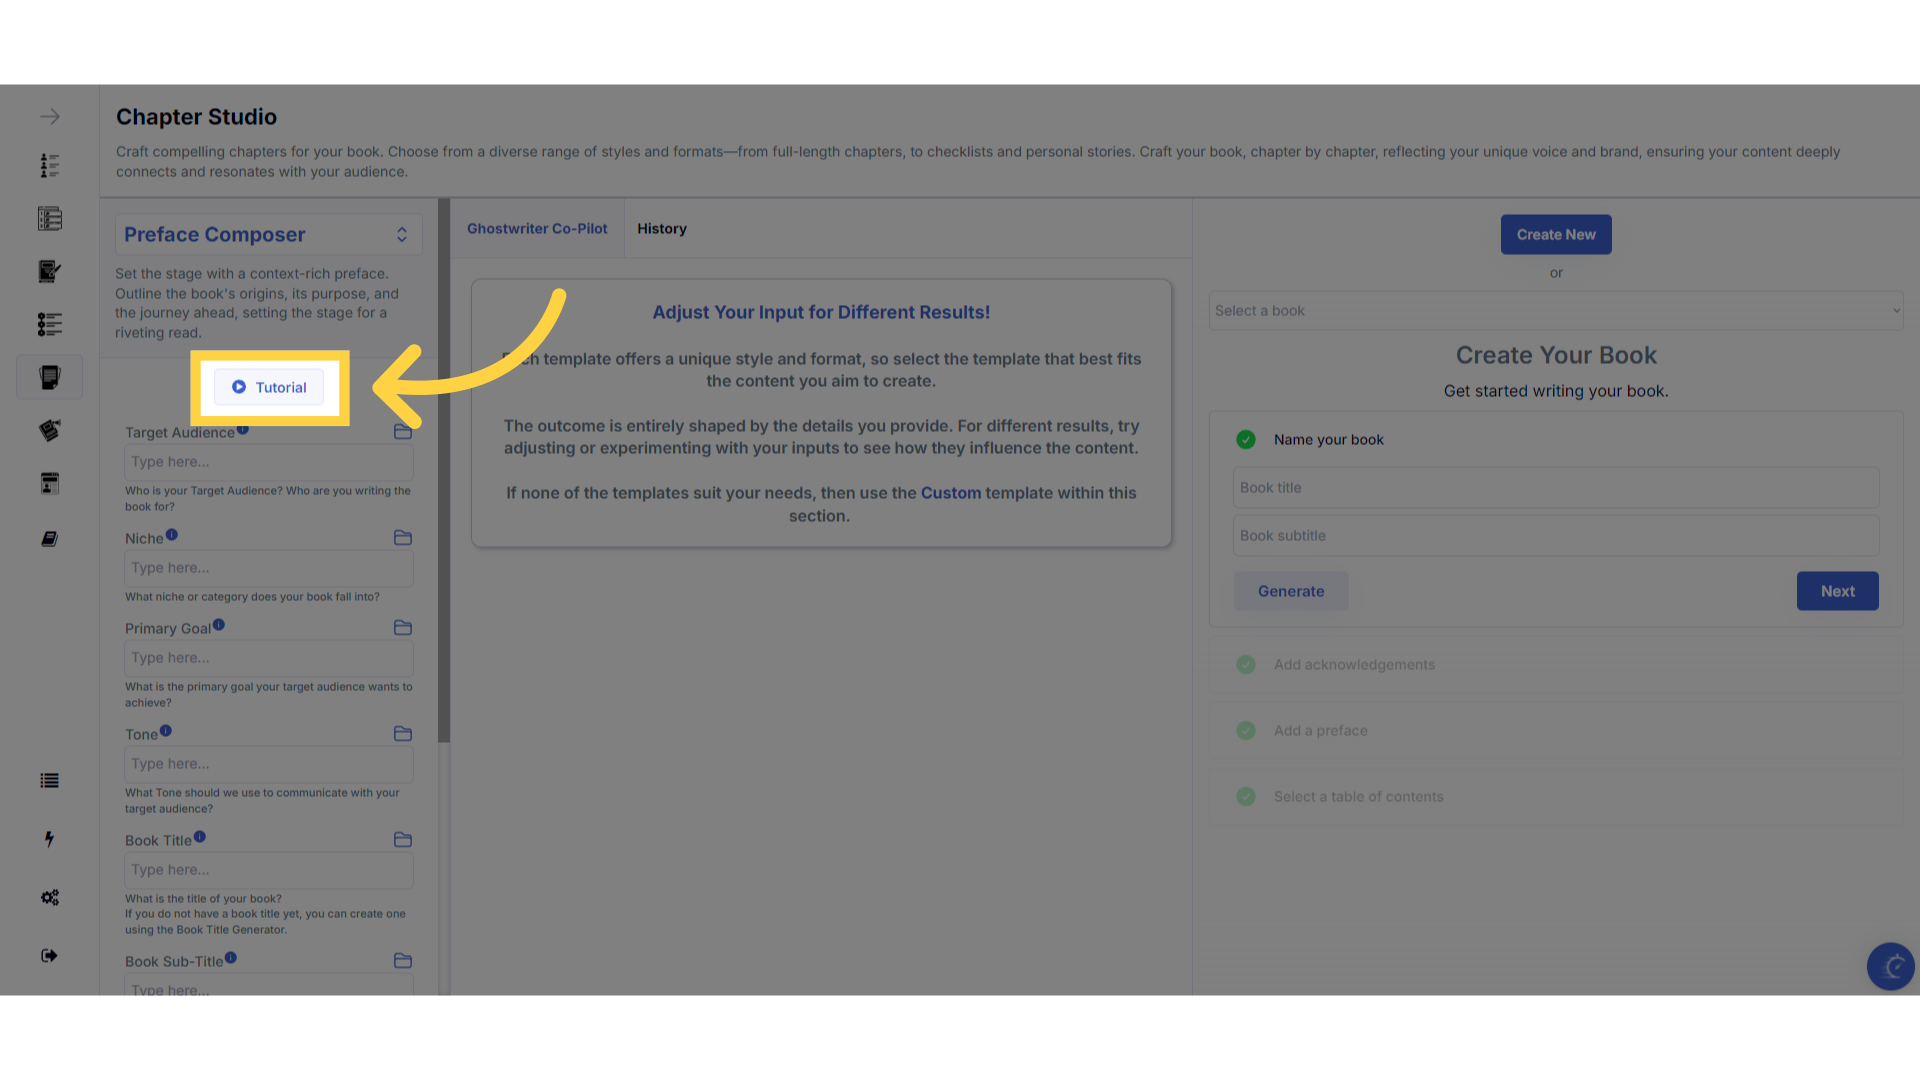
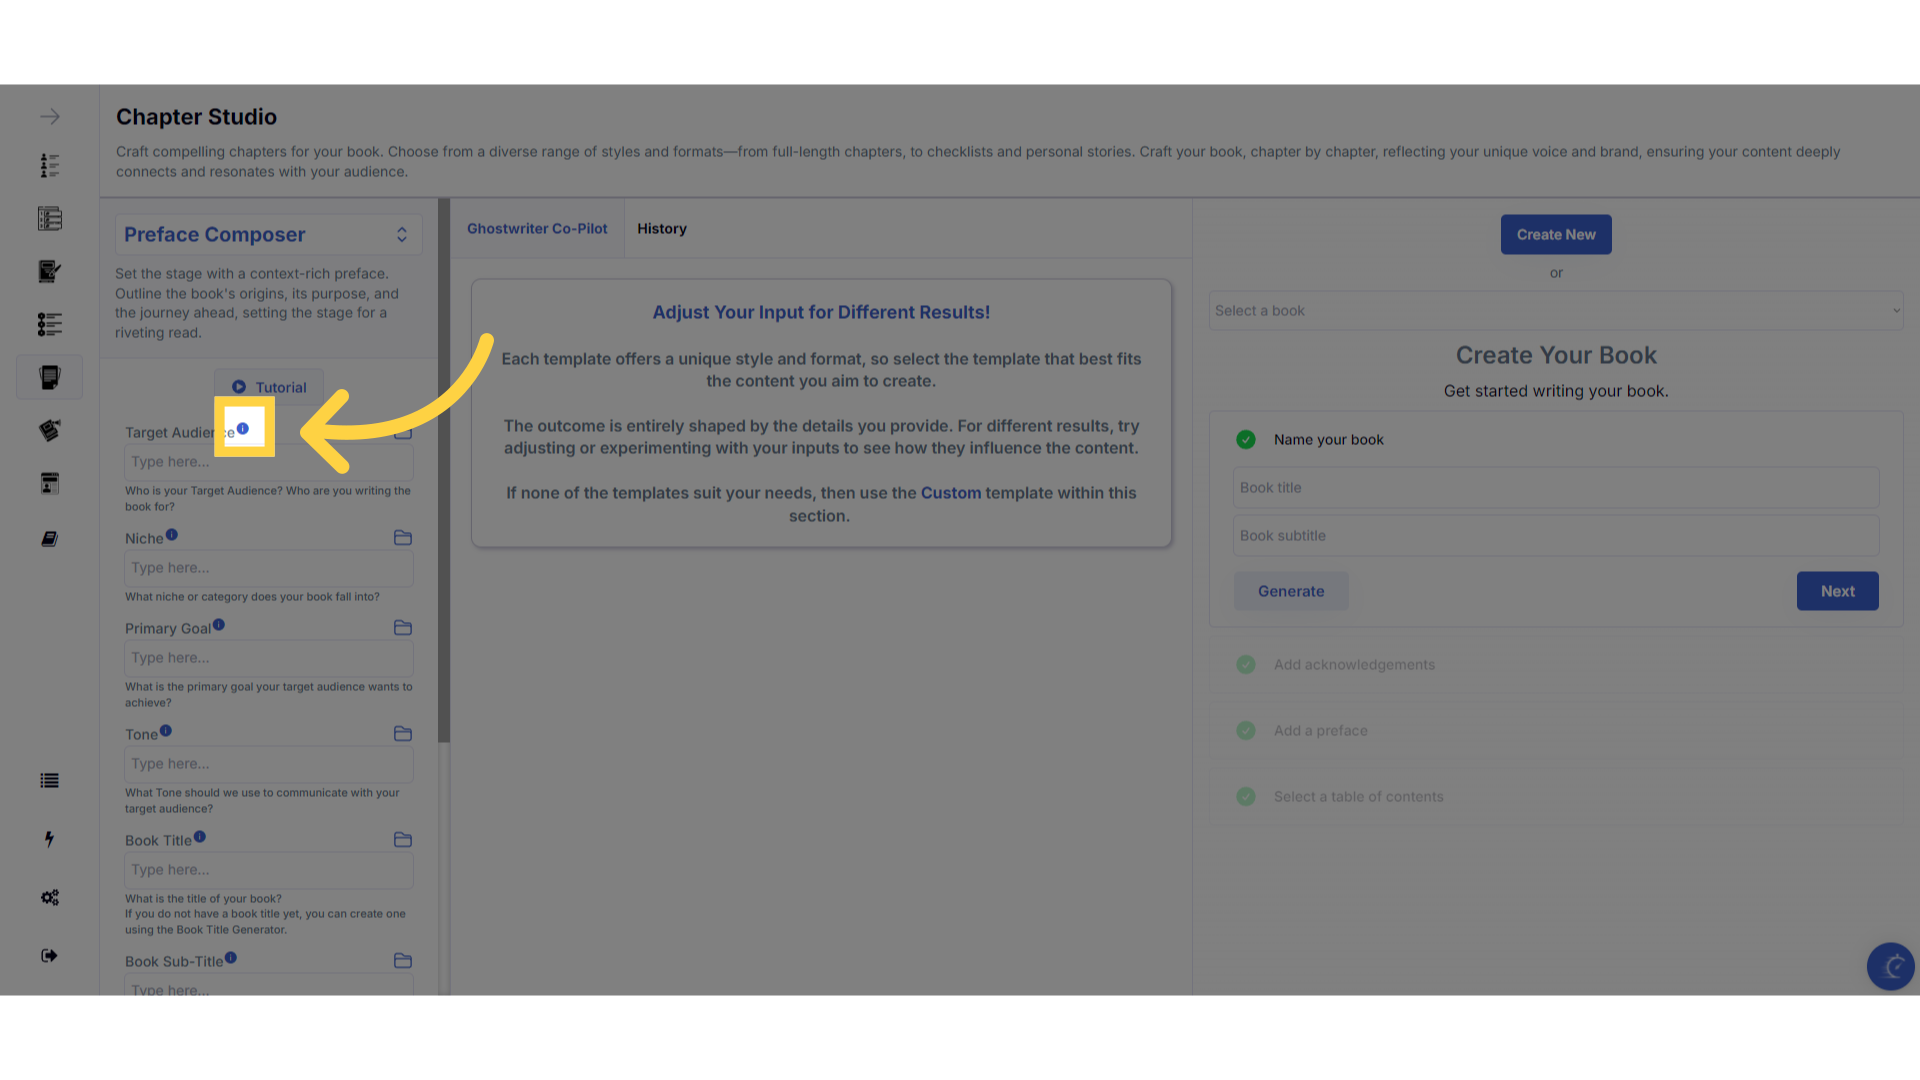
Click the "Tutorial" button to learn more about how to use the template.
If you need help at any time you can watch the tutorial.
)
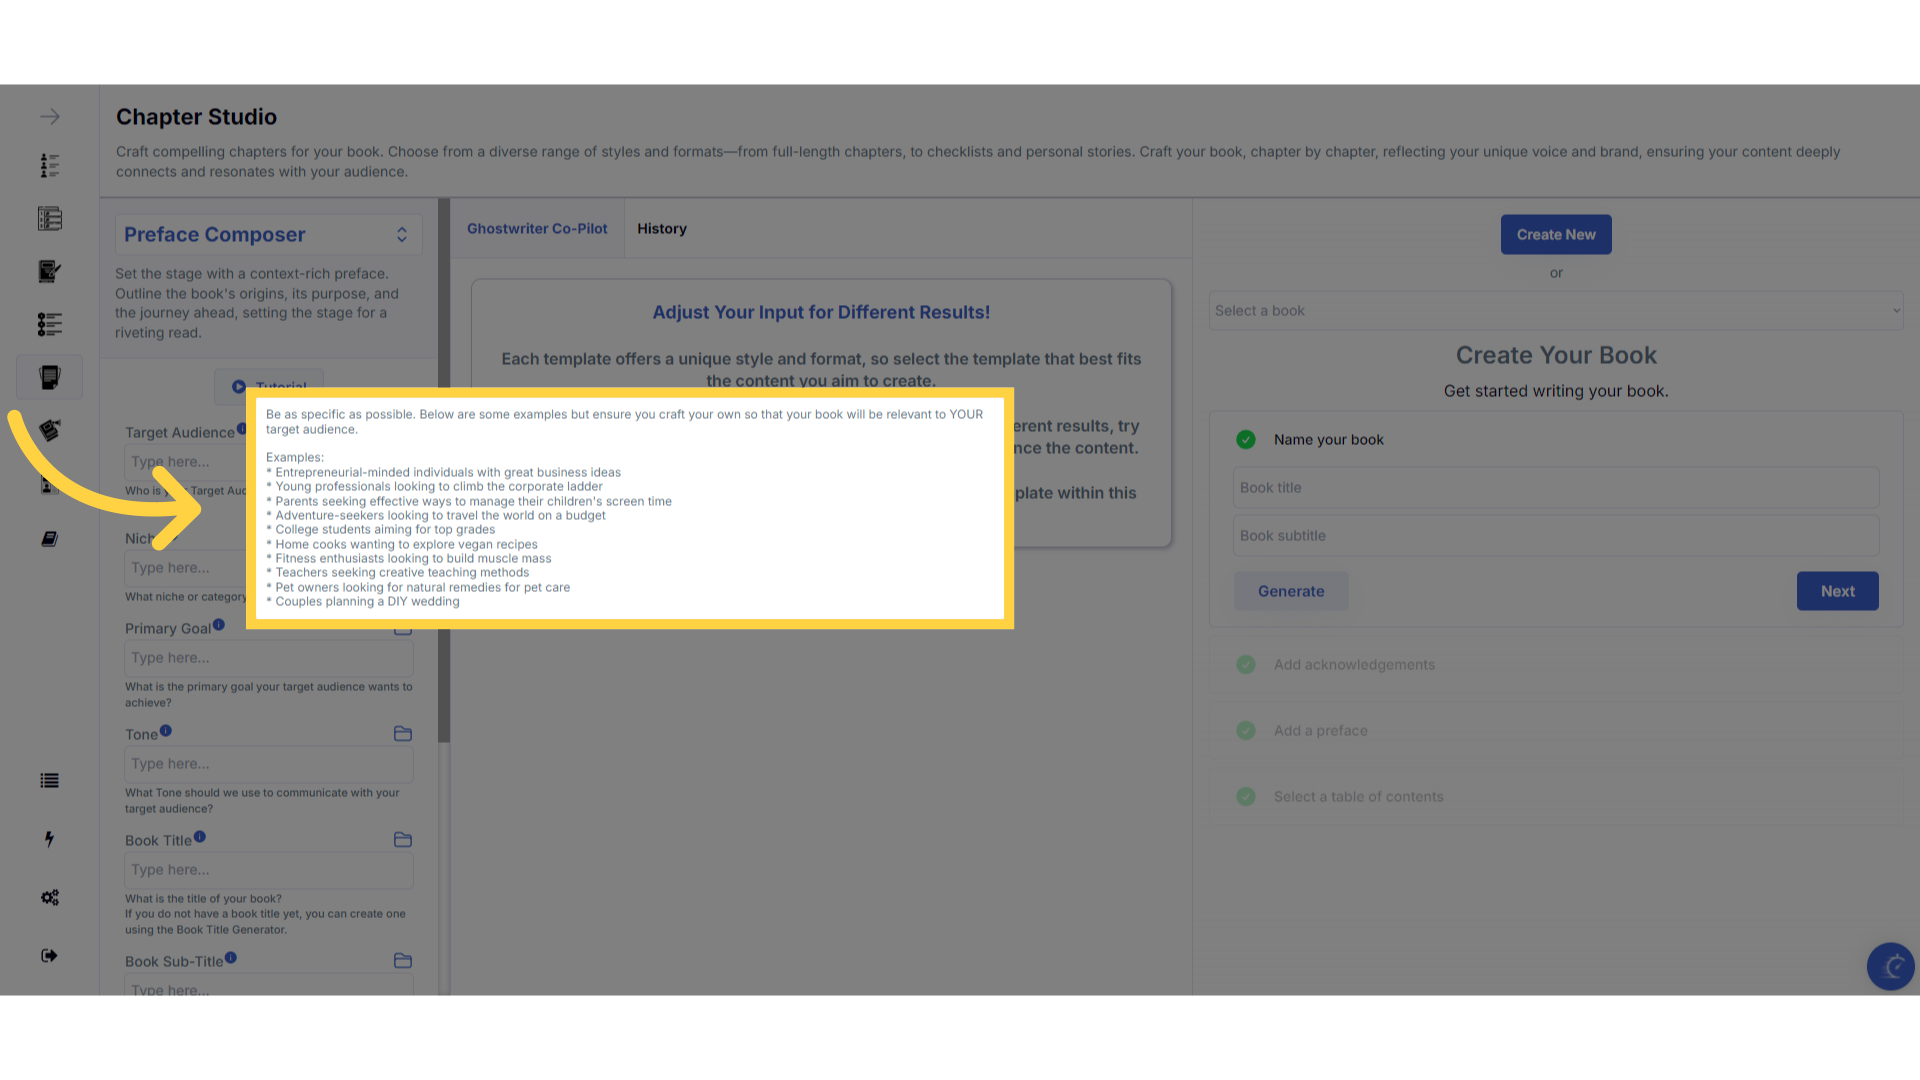
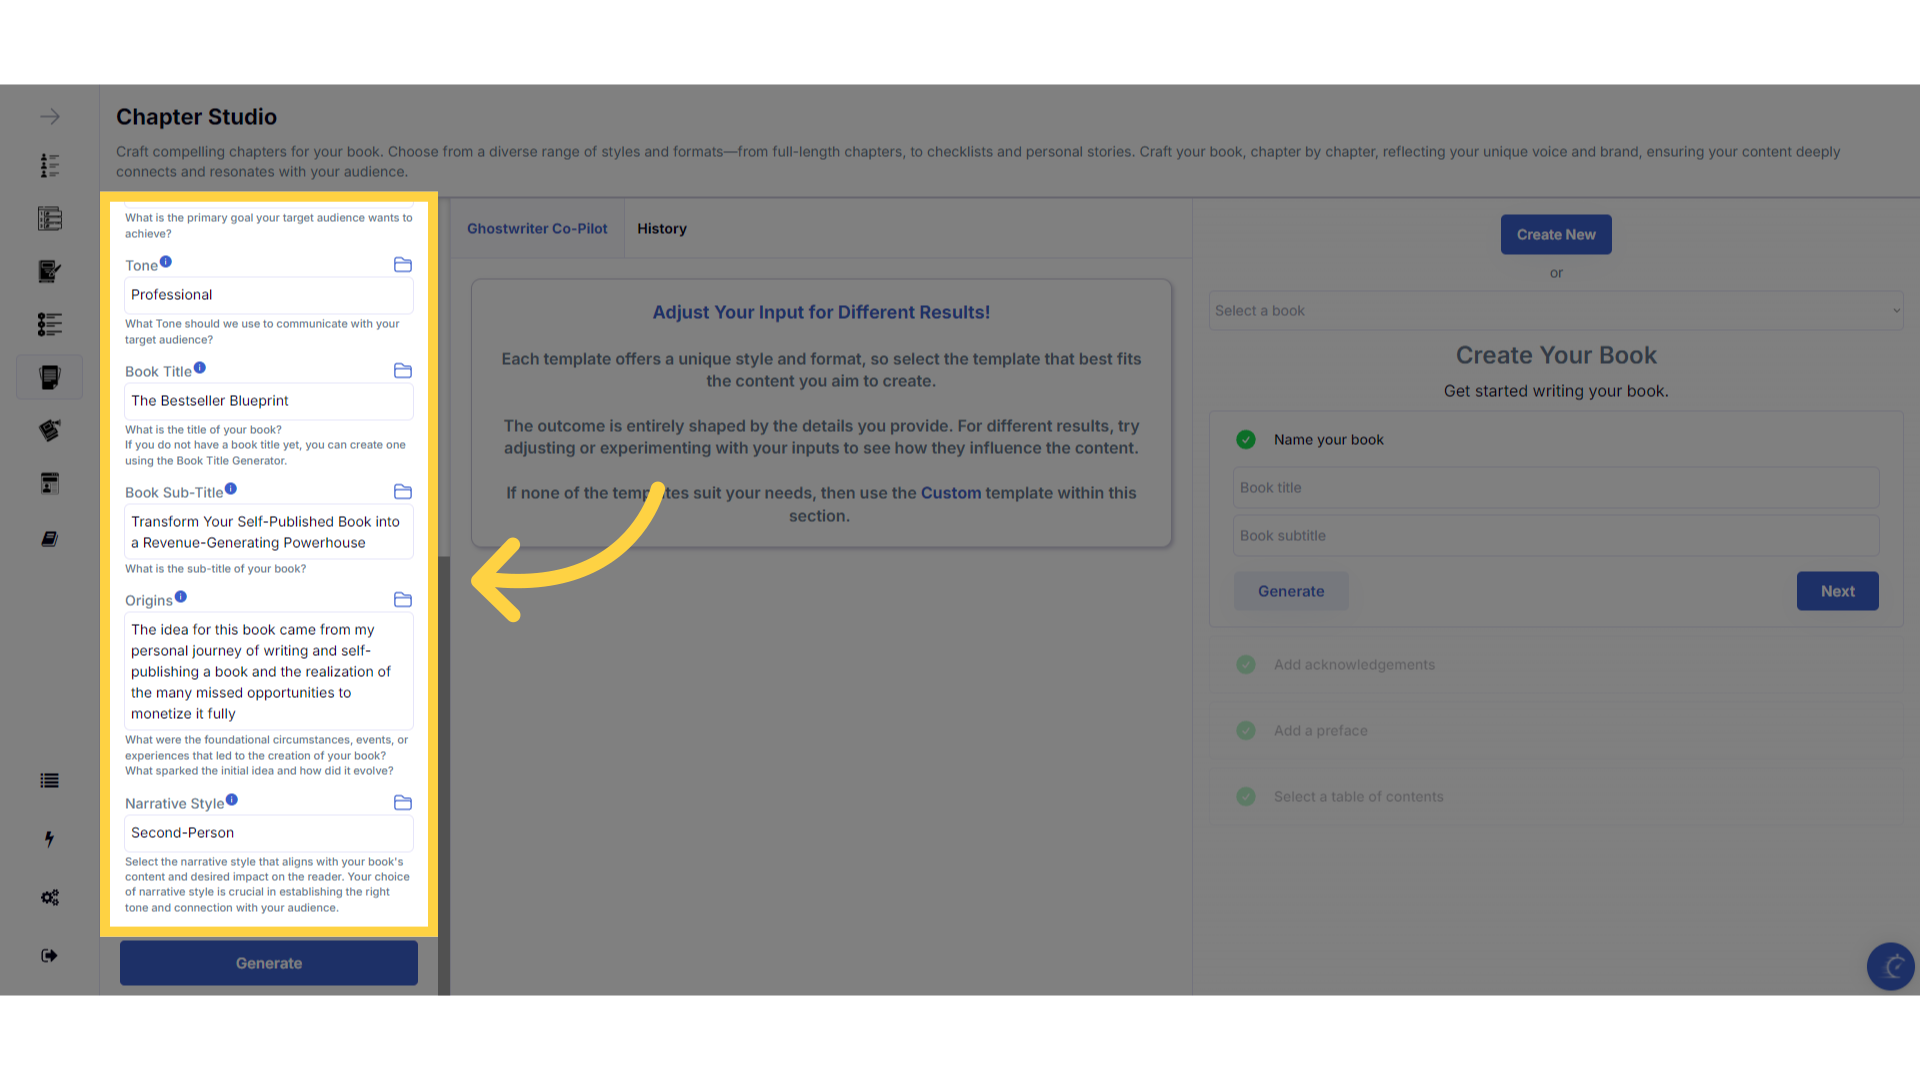
Click the blue "i" icon beside the field name, for an explanation and examples of the information you need to enter in that field.
To help you craft the perfect content, you can select the blue tooltip beside each field name. This will give you an explanation and examples of the information you need to enter in that field.
)
A pop up will display to help you understand what information you need to enter for that field.
A pop up will display with examples of the type of information required.
)
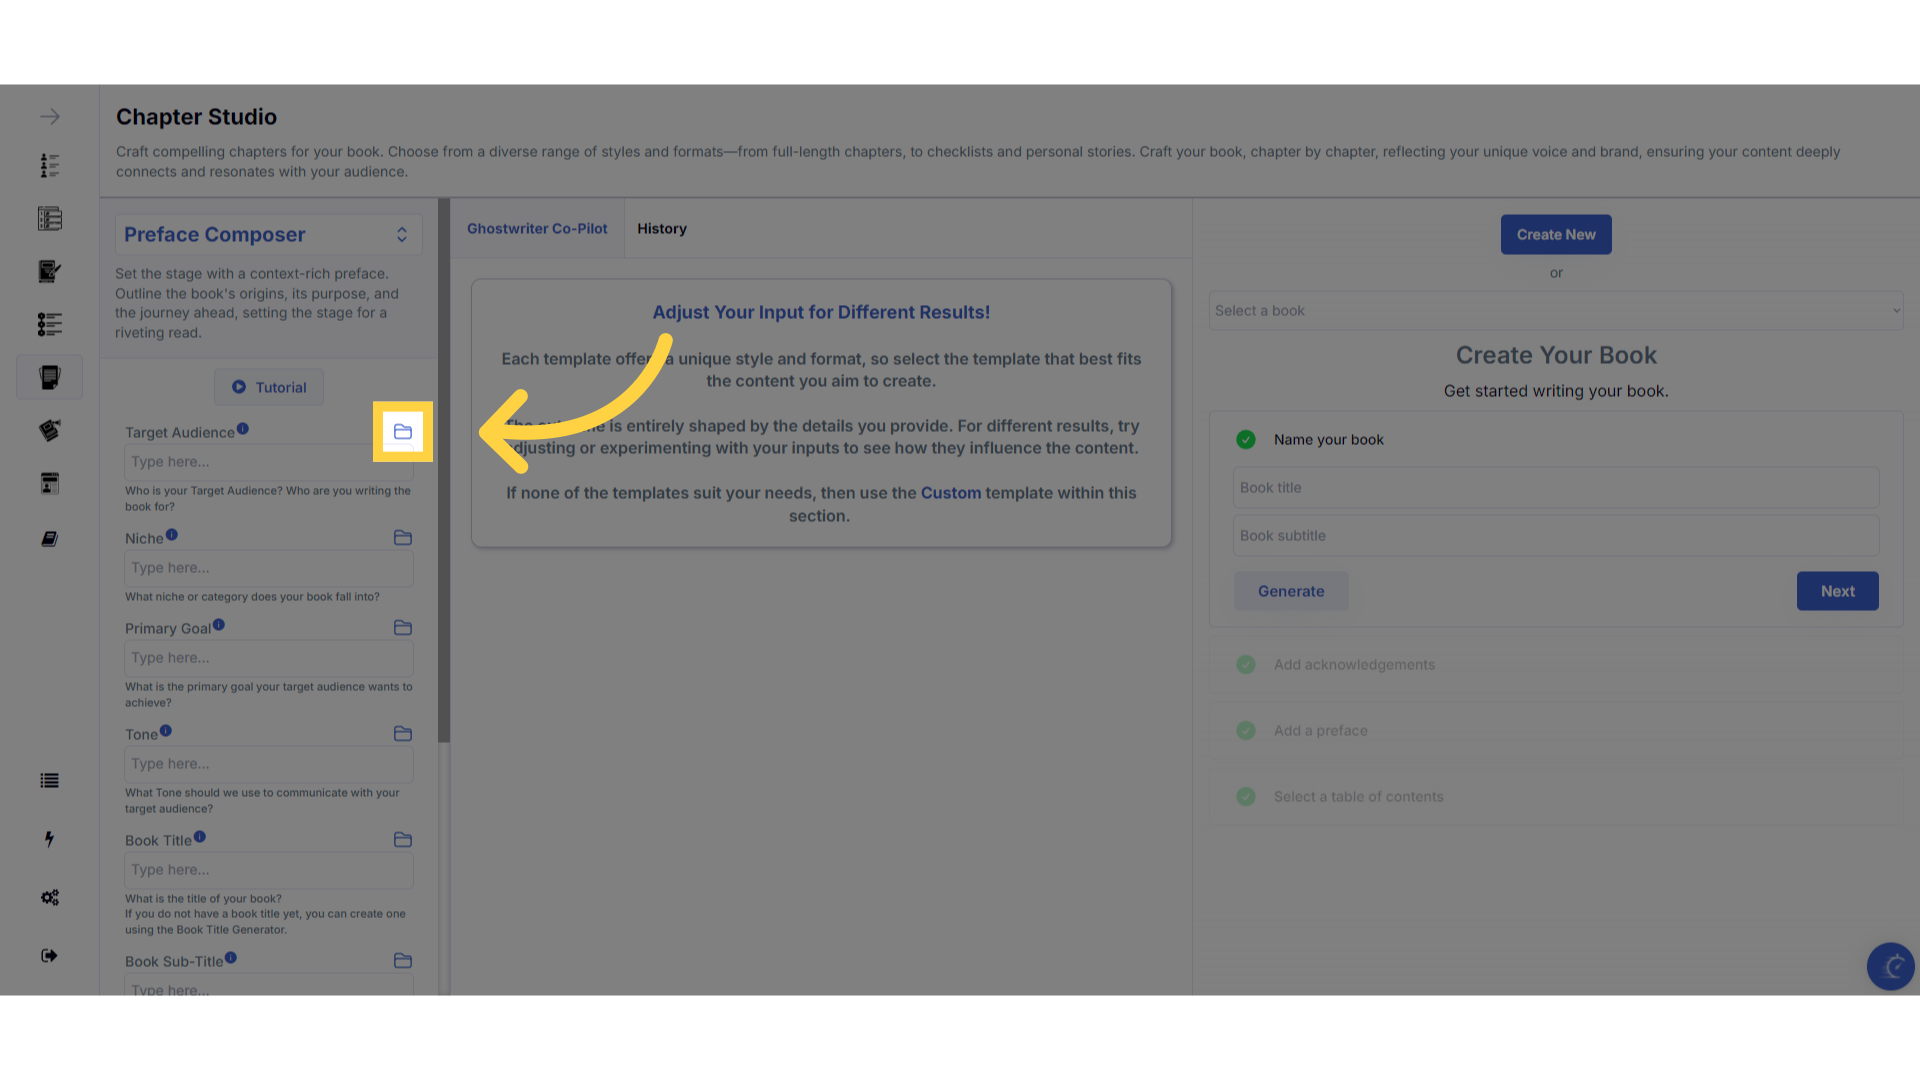
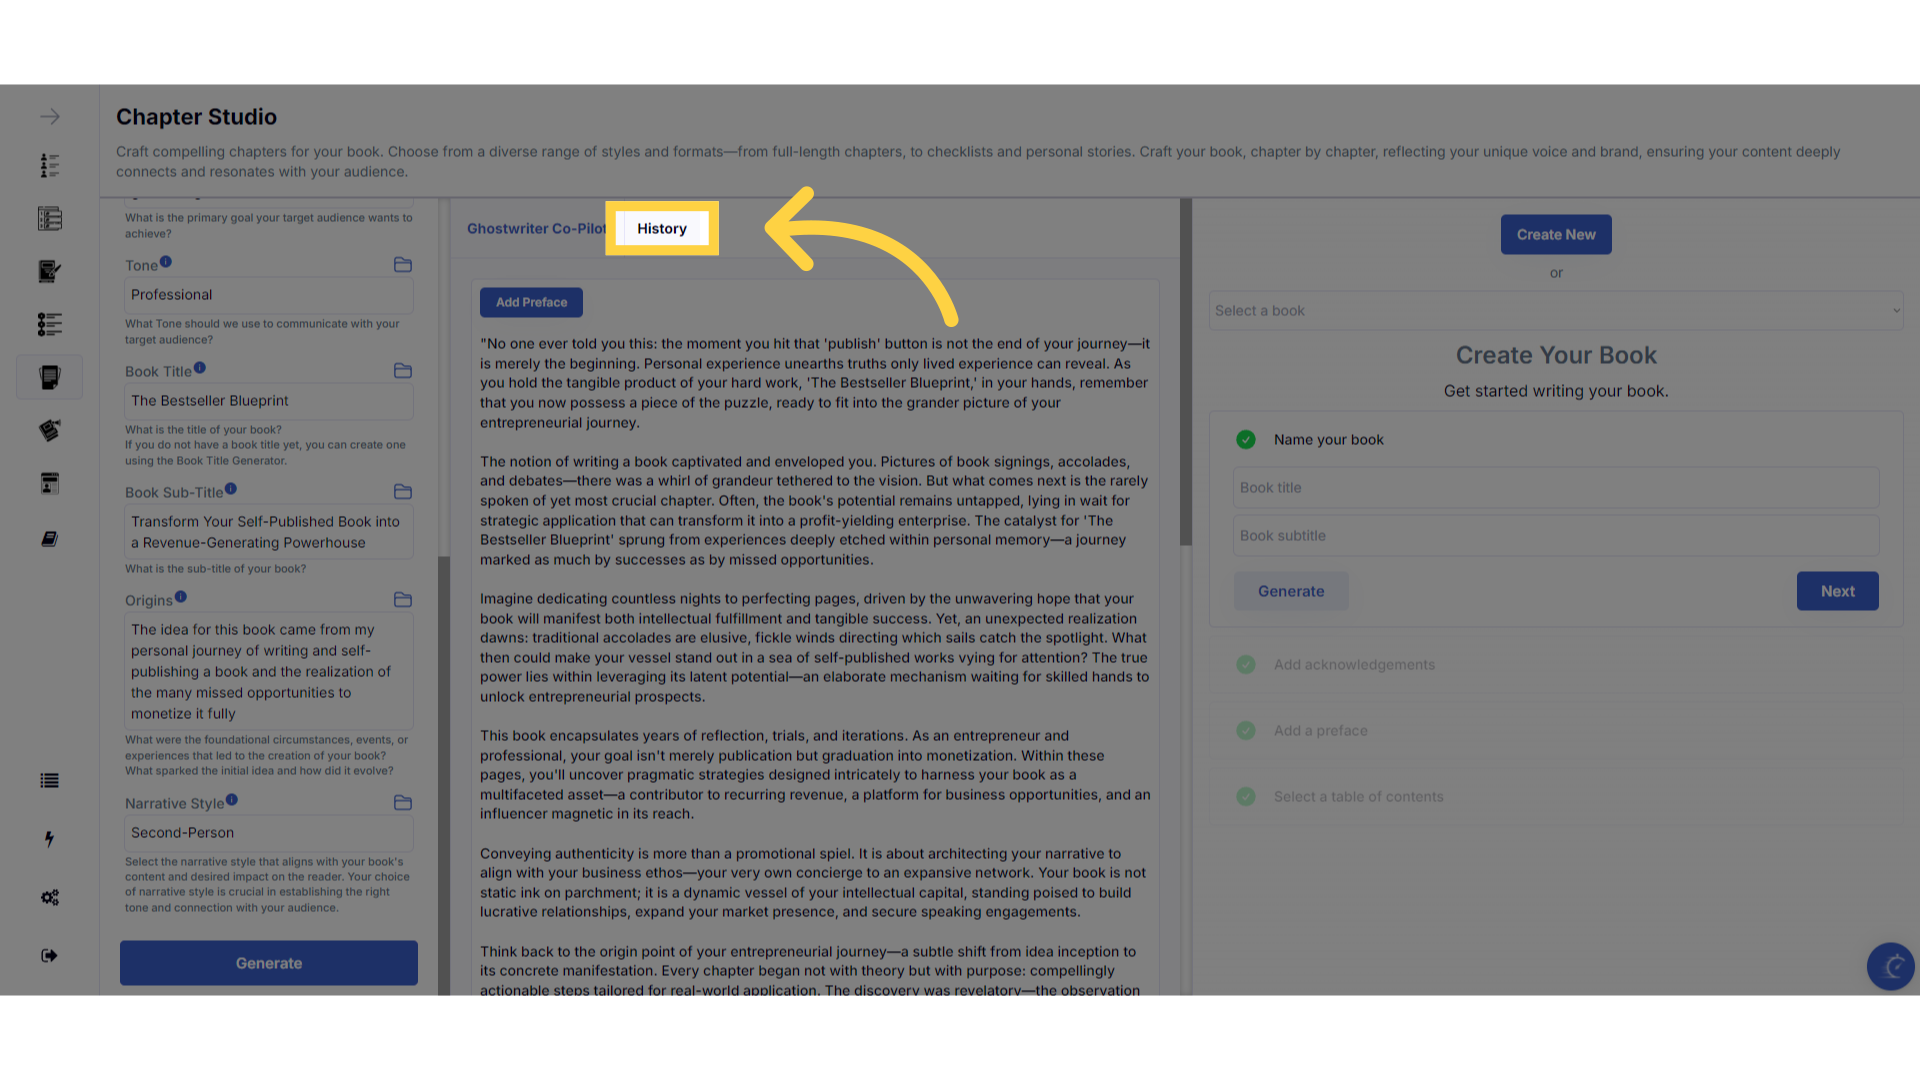
Click the "History" folder to view the last 10 entries for this field.
Once you've added information to a field, a folder will appear on the right that contains the history of the last 10 entries in this field.
)
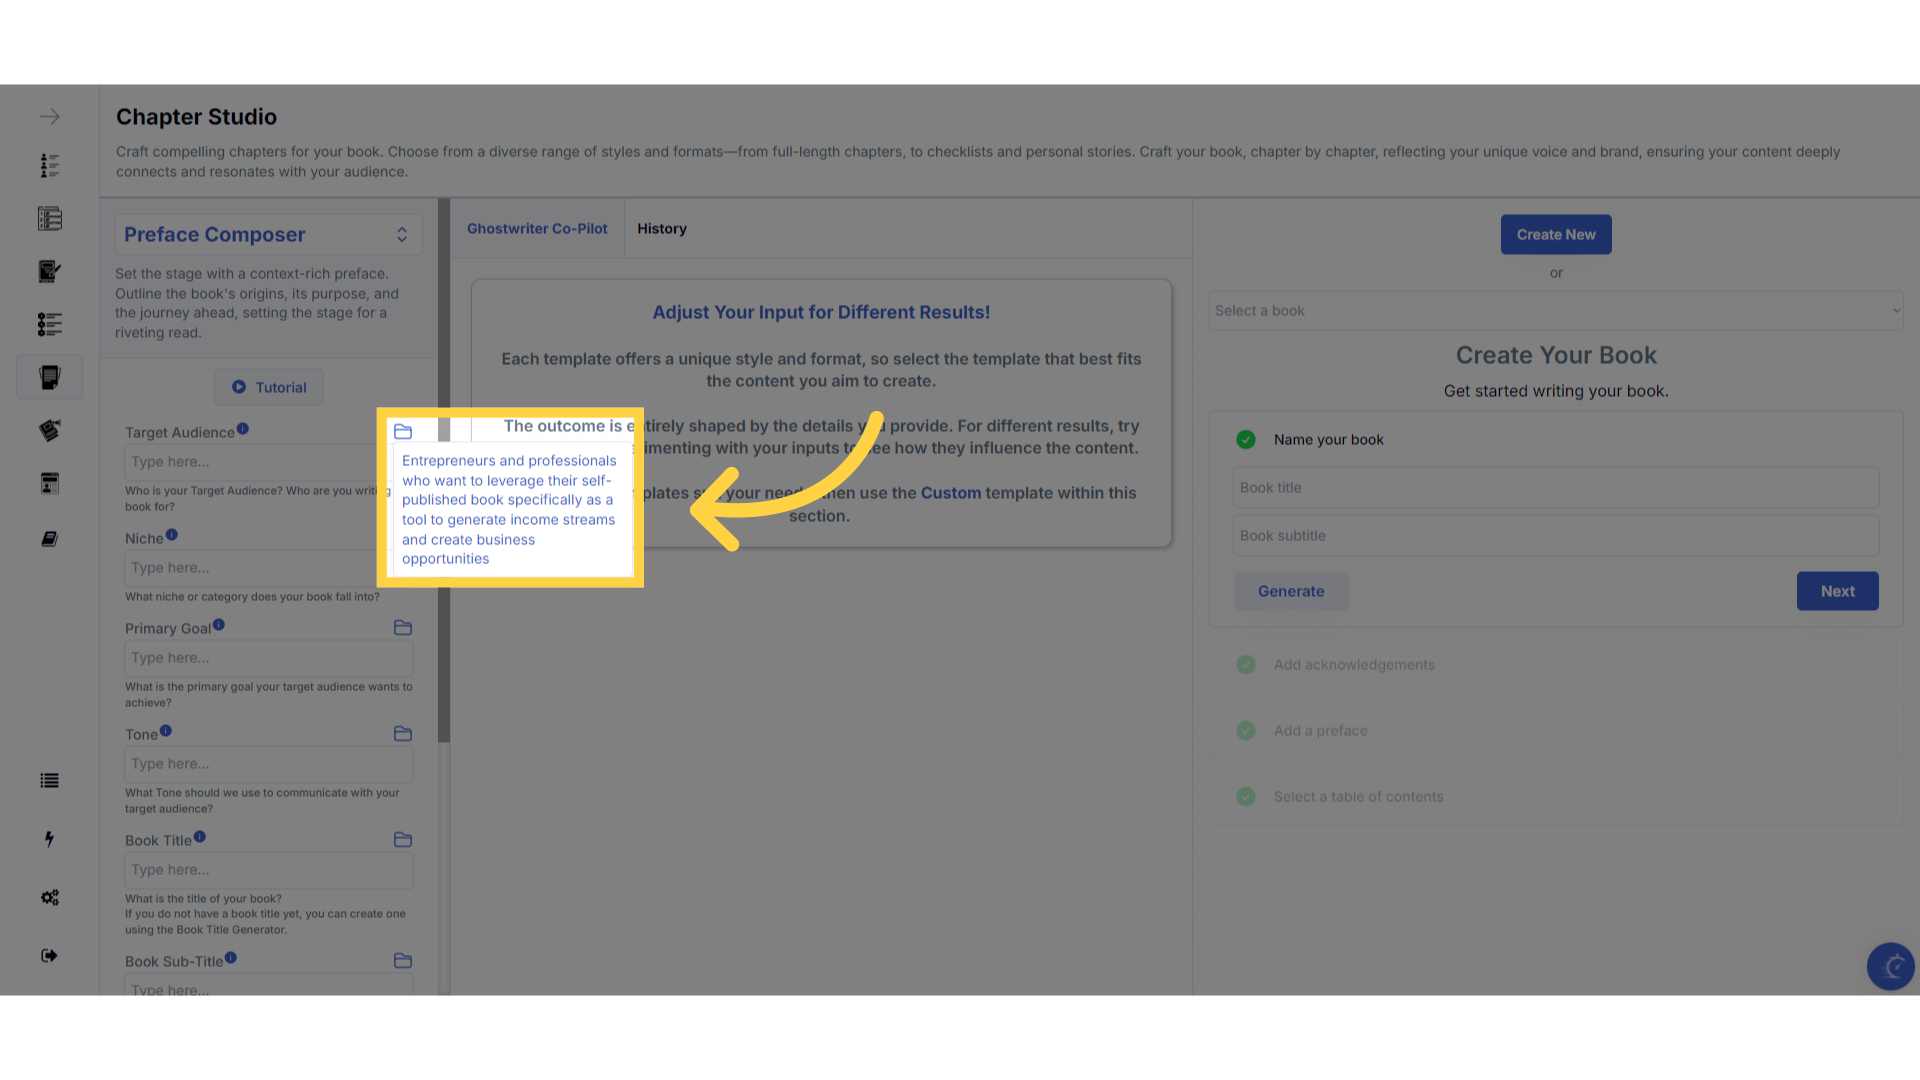
Click on the "History" folder to easily re-select information you've already entered, and add it to that field.
Click on the history folder to easily re-select information you've already entered, and add it to that field.
)
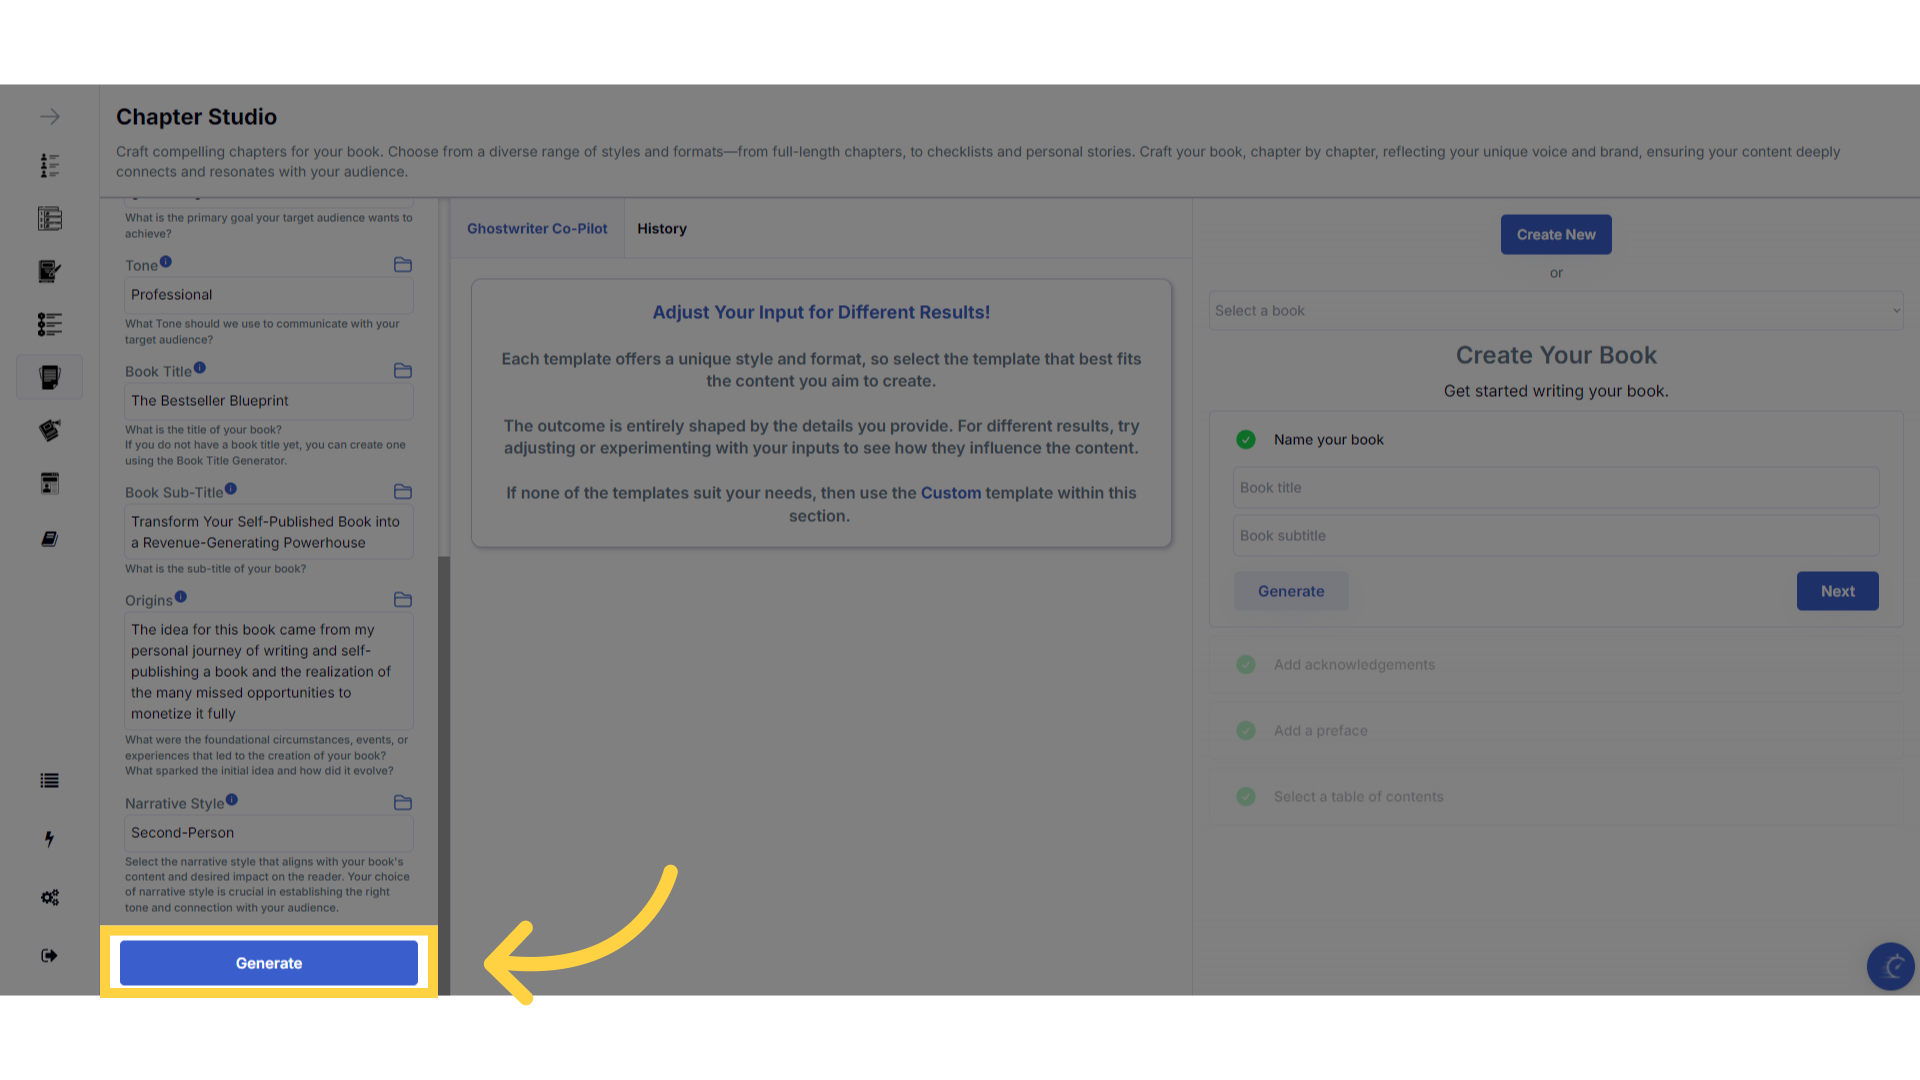
Enter the required information to generate the Preface.
Enter the required information to generate the preface.
)
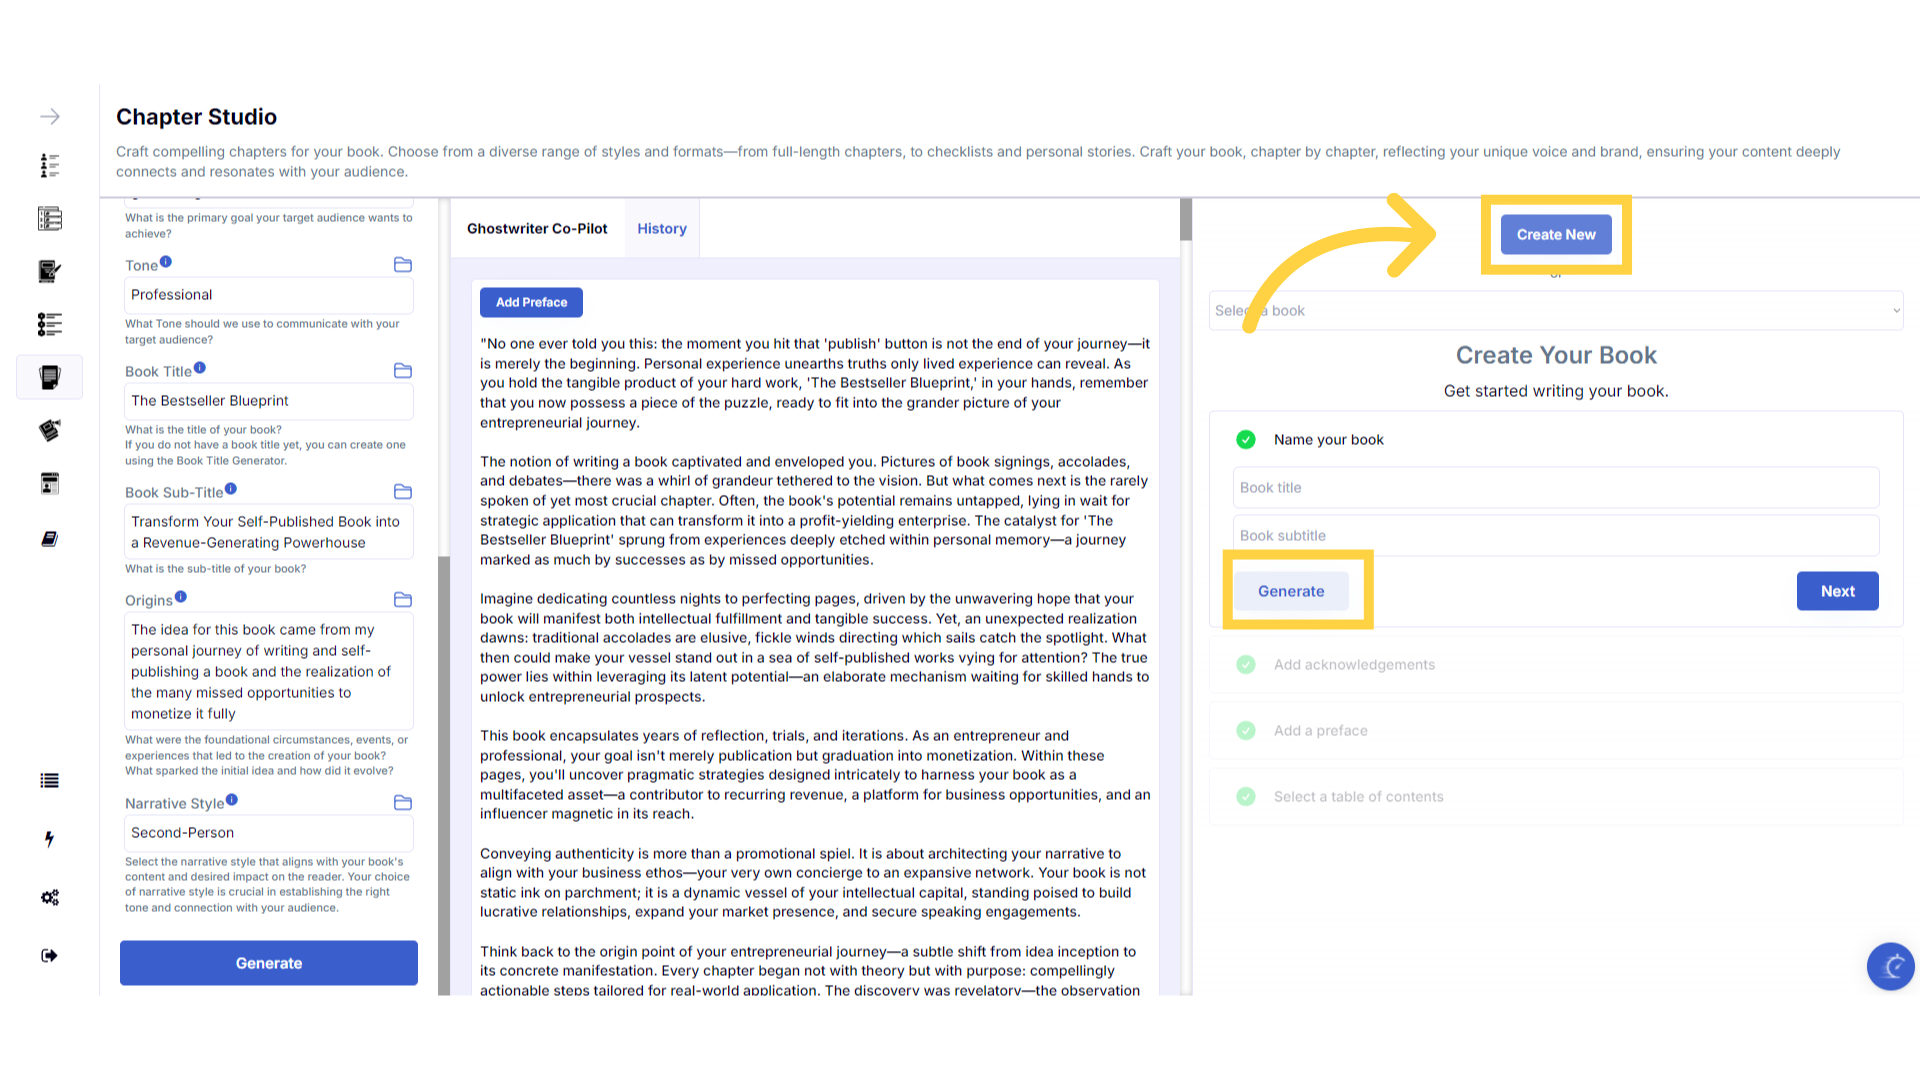
Click "Generate" to craft the Preface.
You can change the information you provide, and re-generate the content as many times as you need, to craft the perfect preface for your book.
)
View or use your previous content generated in the "History" section.
The history stores all of the content you've generated. Select the history button to view or use any of the past content you've created with this template.
)
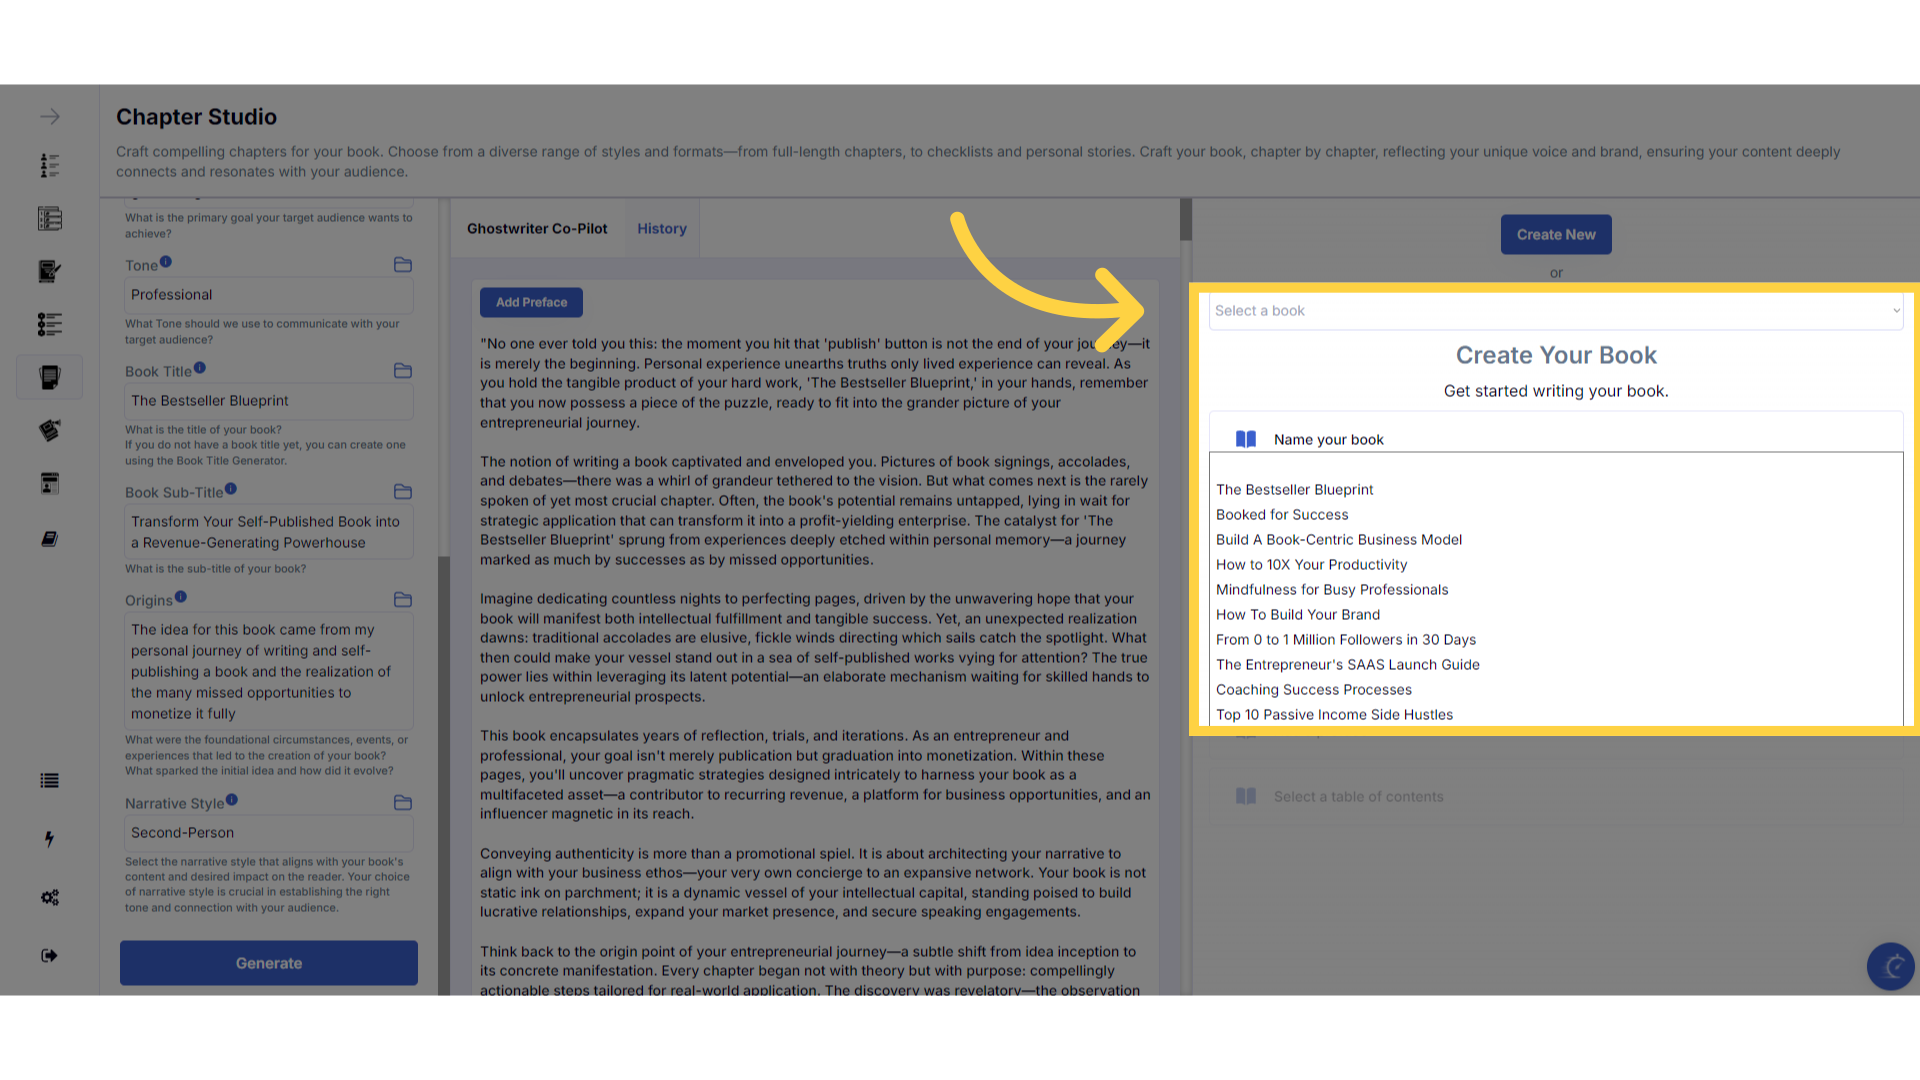
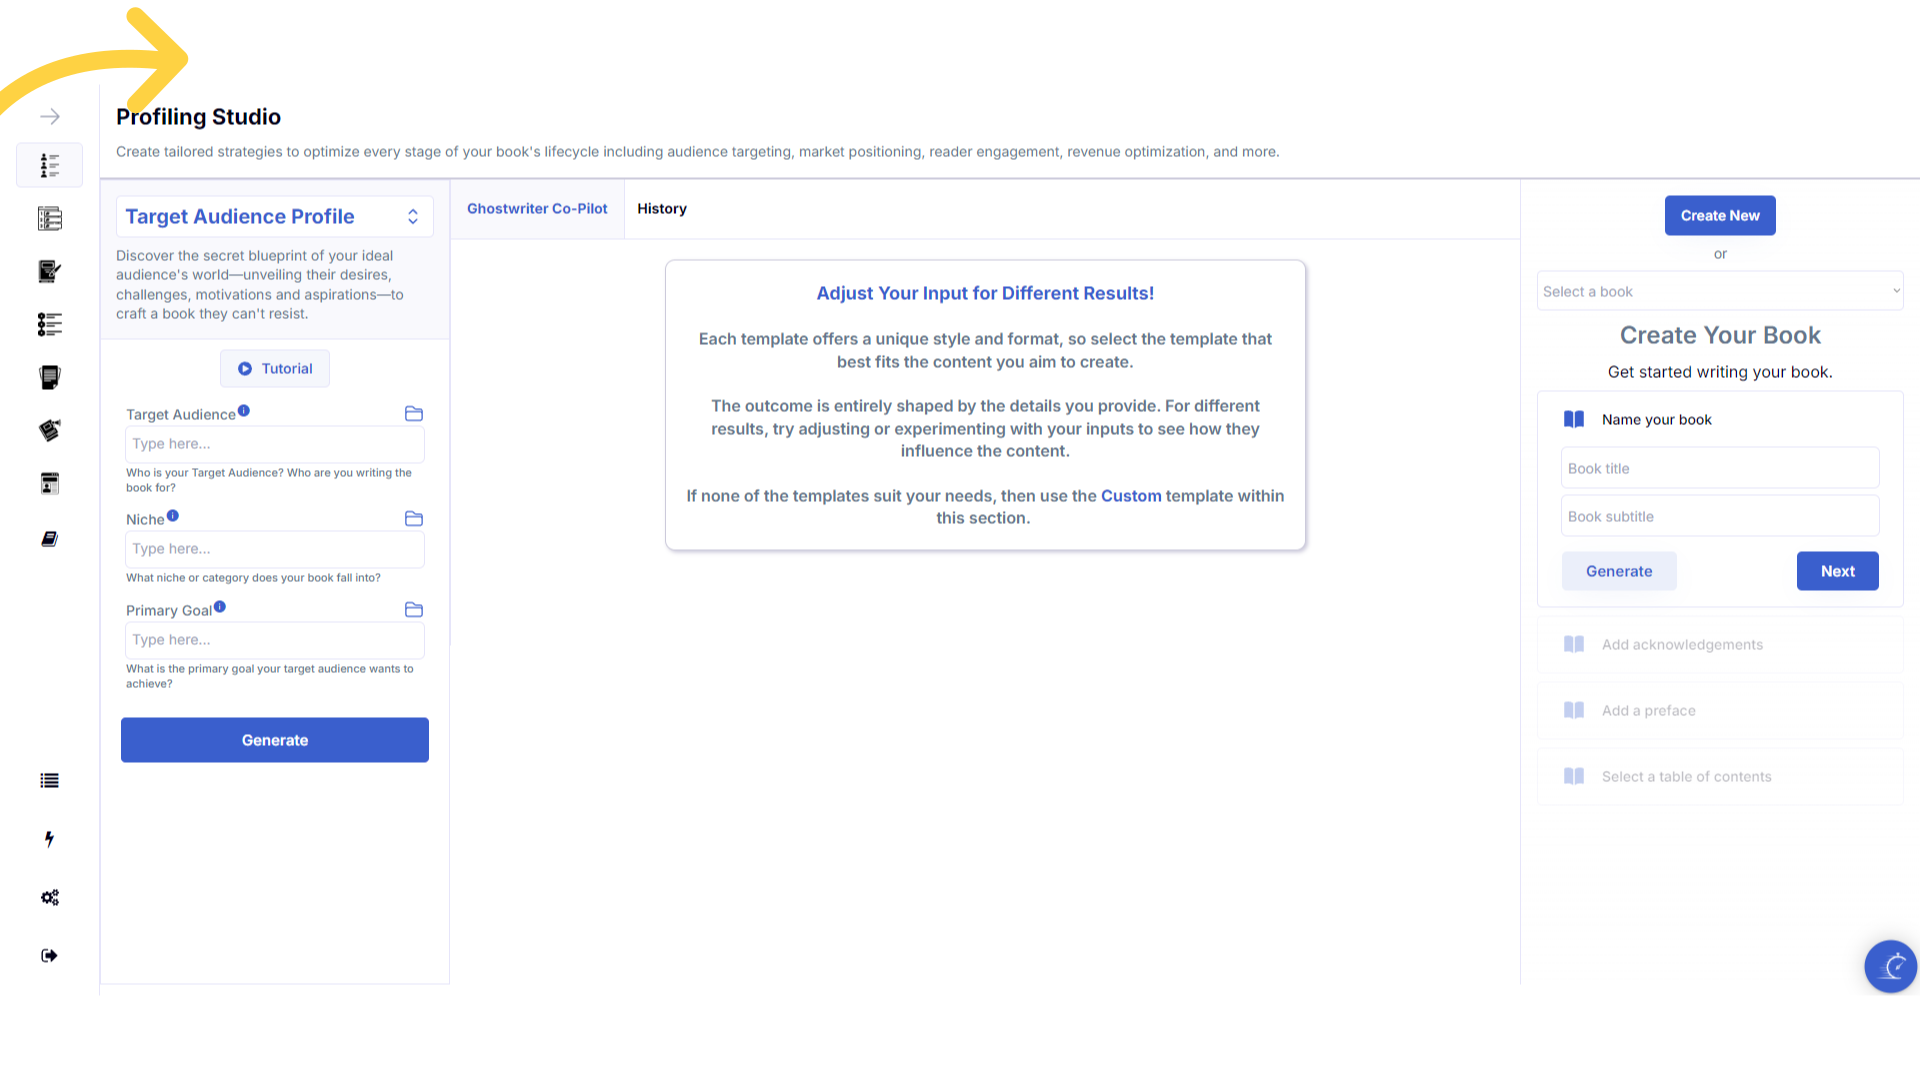
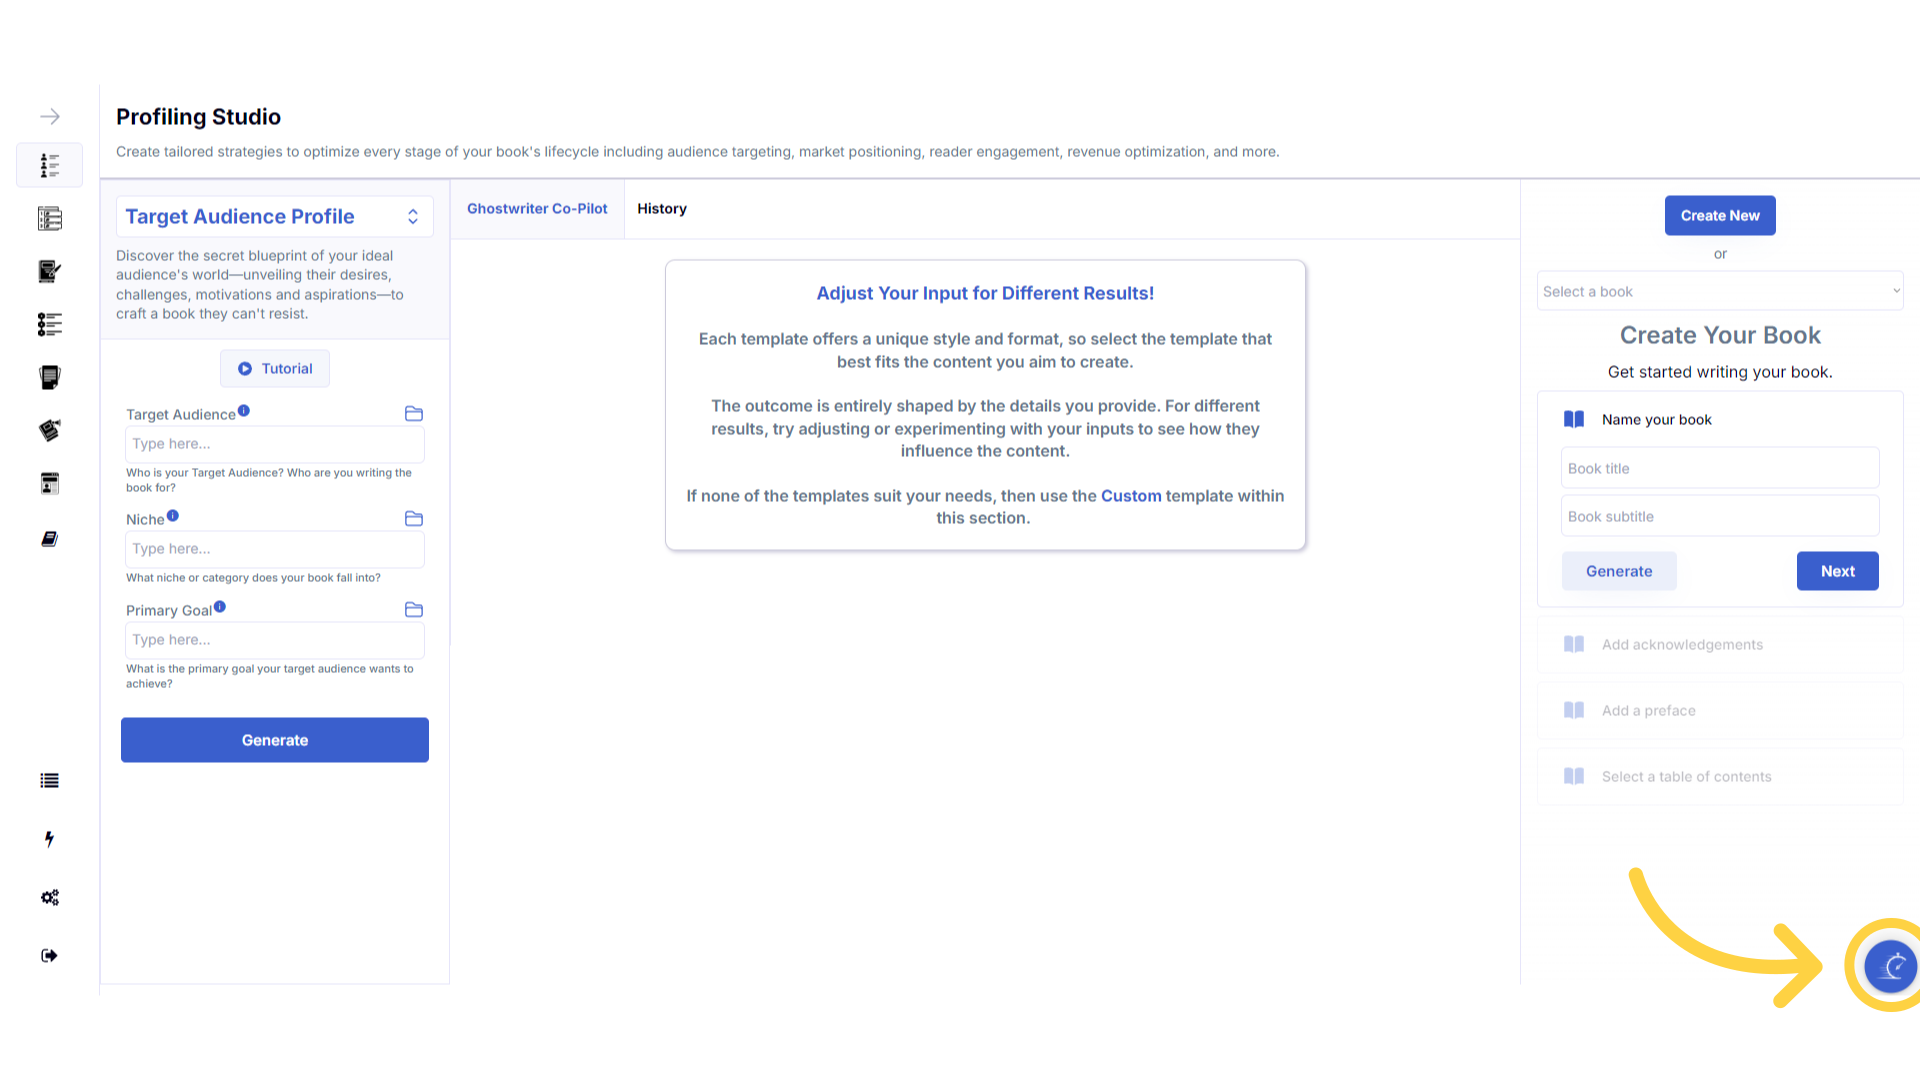
Click "Create New" if you haven't created your book yet.
You will be guided to craft your preface each time you create a new book. If you skip this in the book creation process, you can add it in the chapter studio after you have generated your book. If you haven't created your book yet, click create new and follow the steps to create your book.
)
To continue working on a book you've already created, click the dropdown menu and select the book title.
If you have previously created a book that you would like to work on, you can select or change between your books by selecting the book title from the dropdown menu.
)
Highlight the preface content you would like to add.
When your book is selected in the book builder, you will see the table of contents on the right. Highlight the content you would like to add to the preface and copy the text.
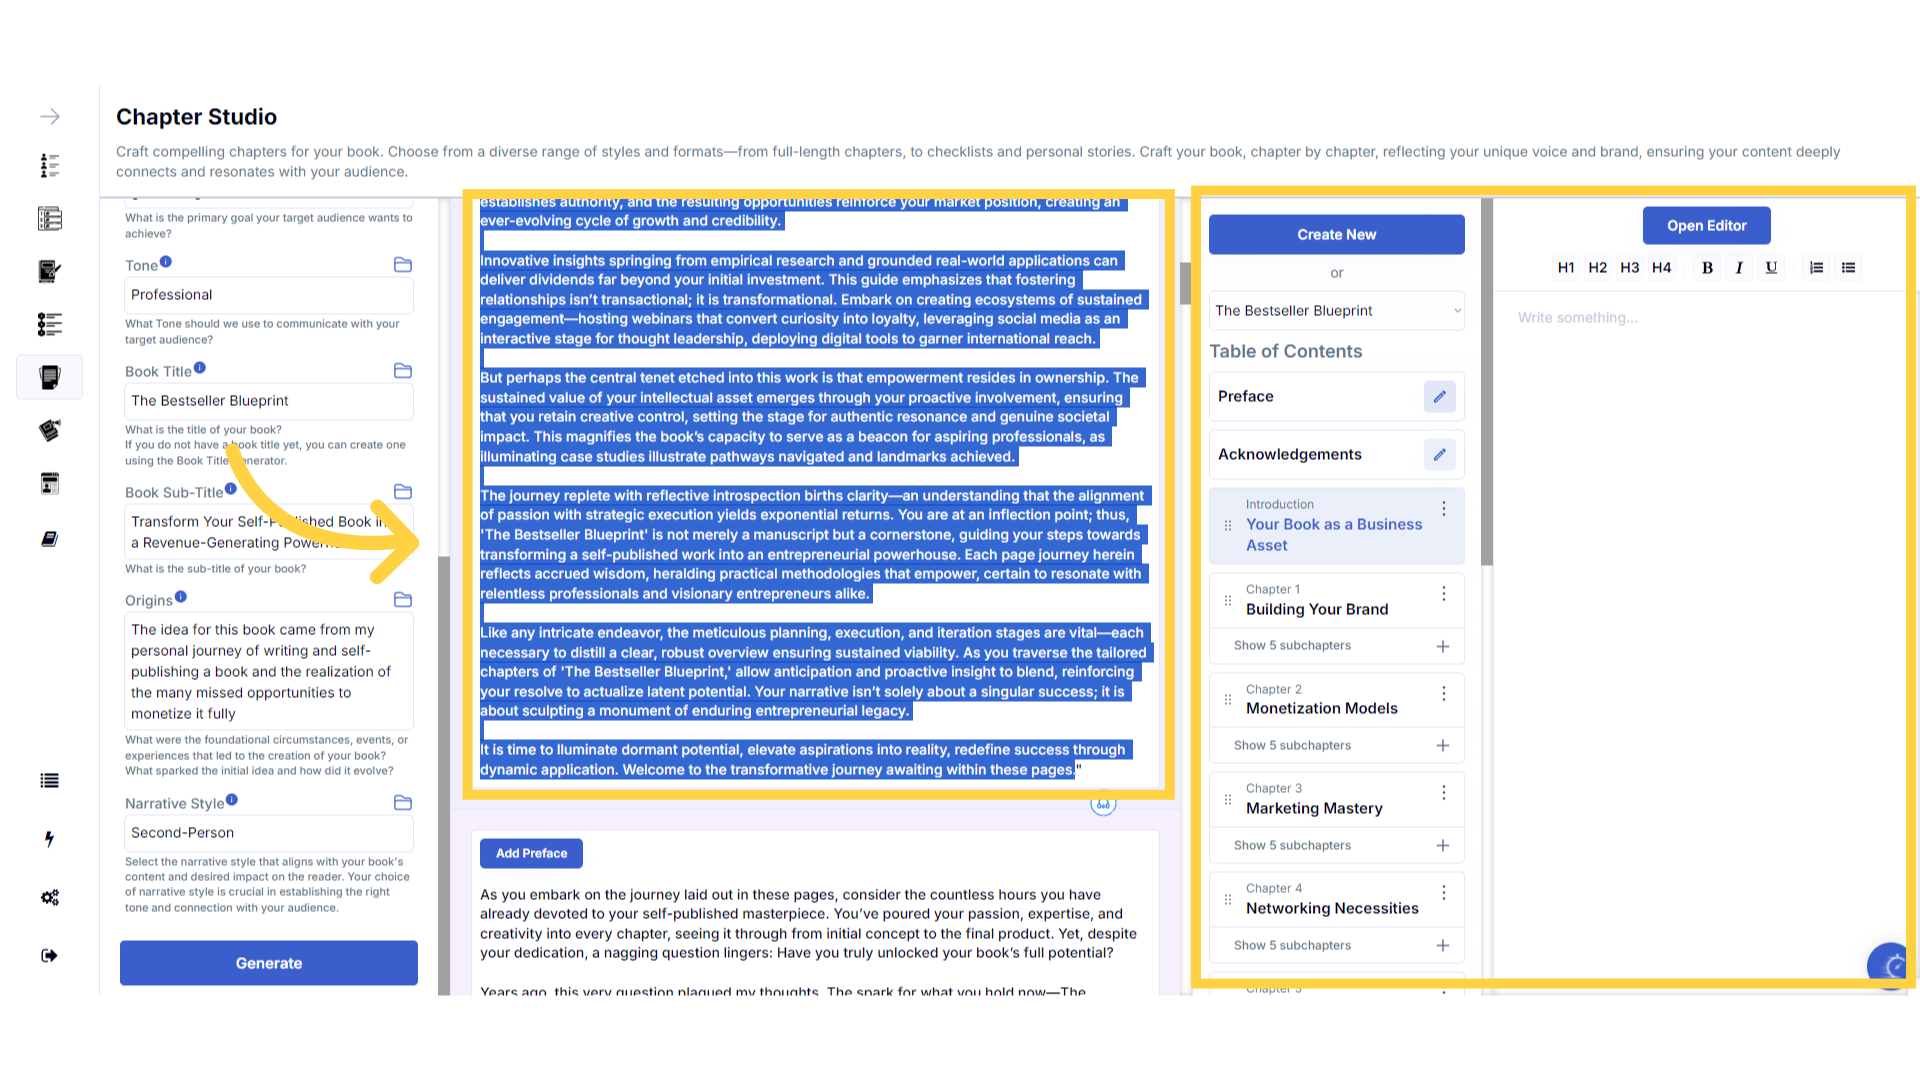)
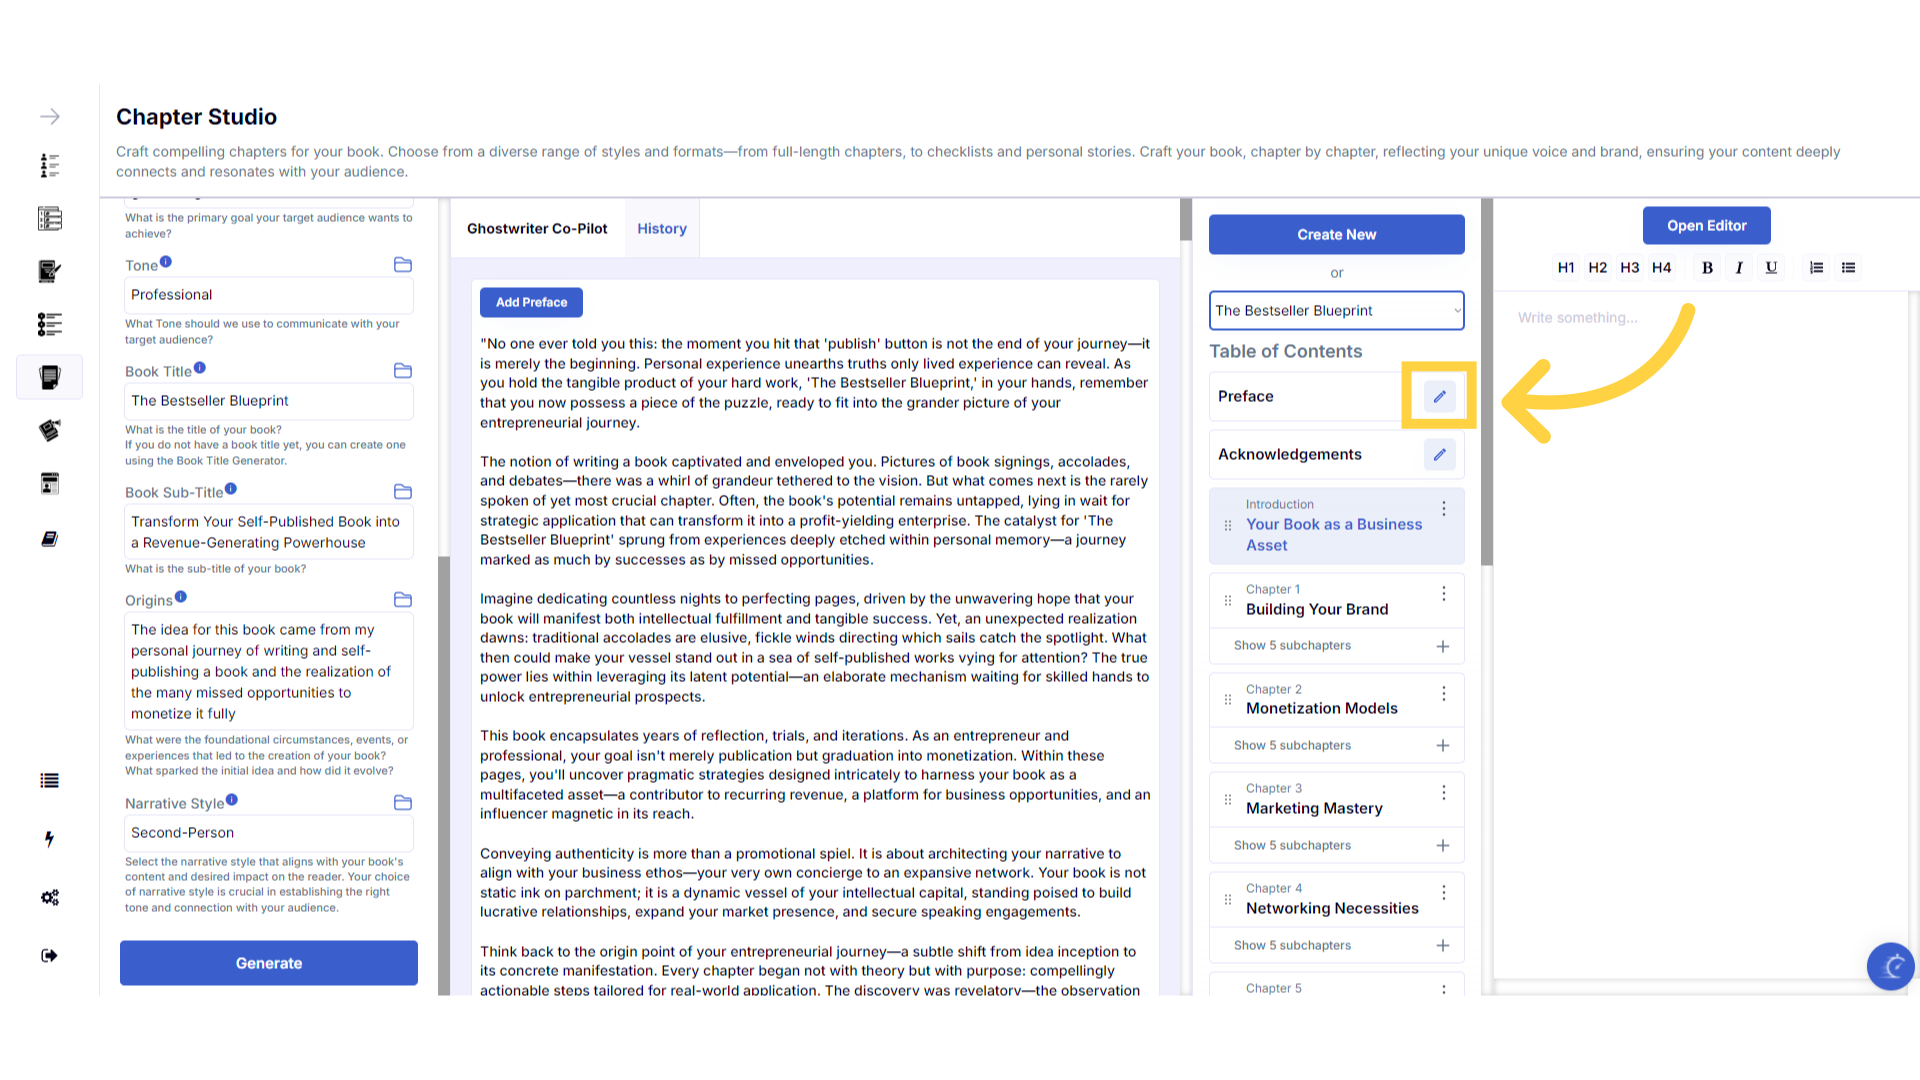
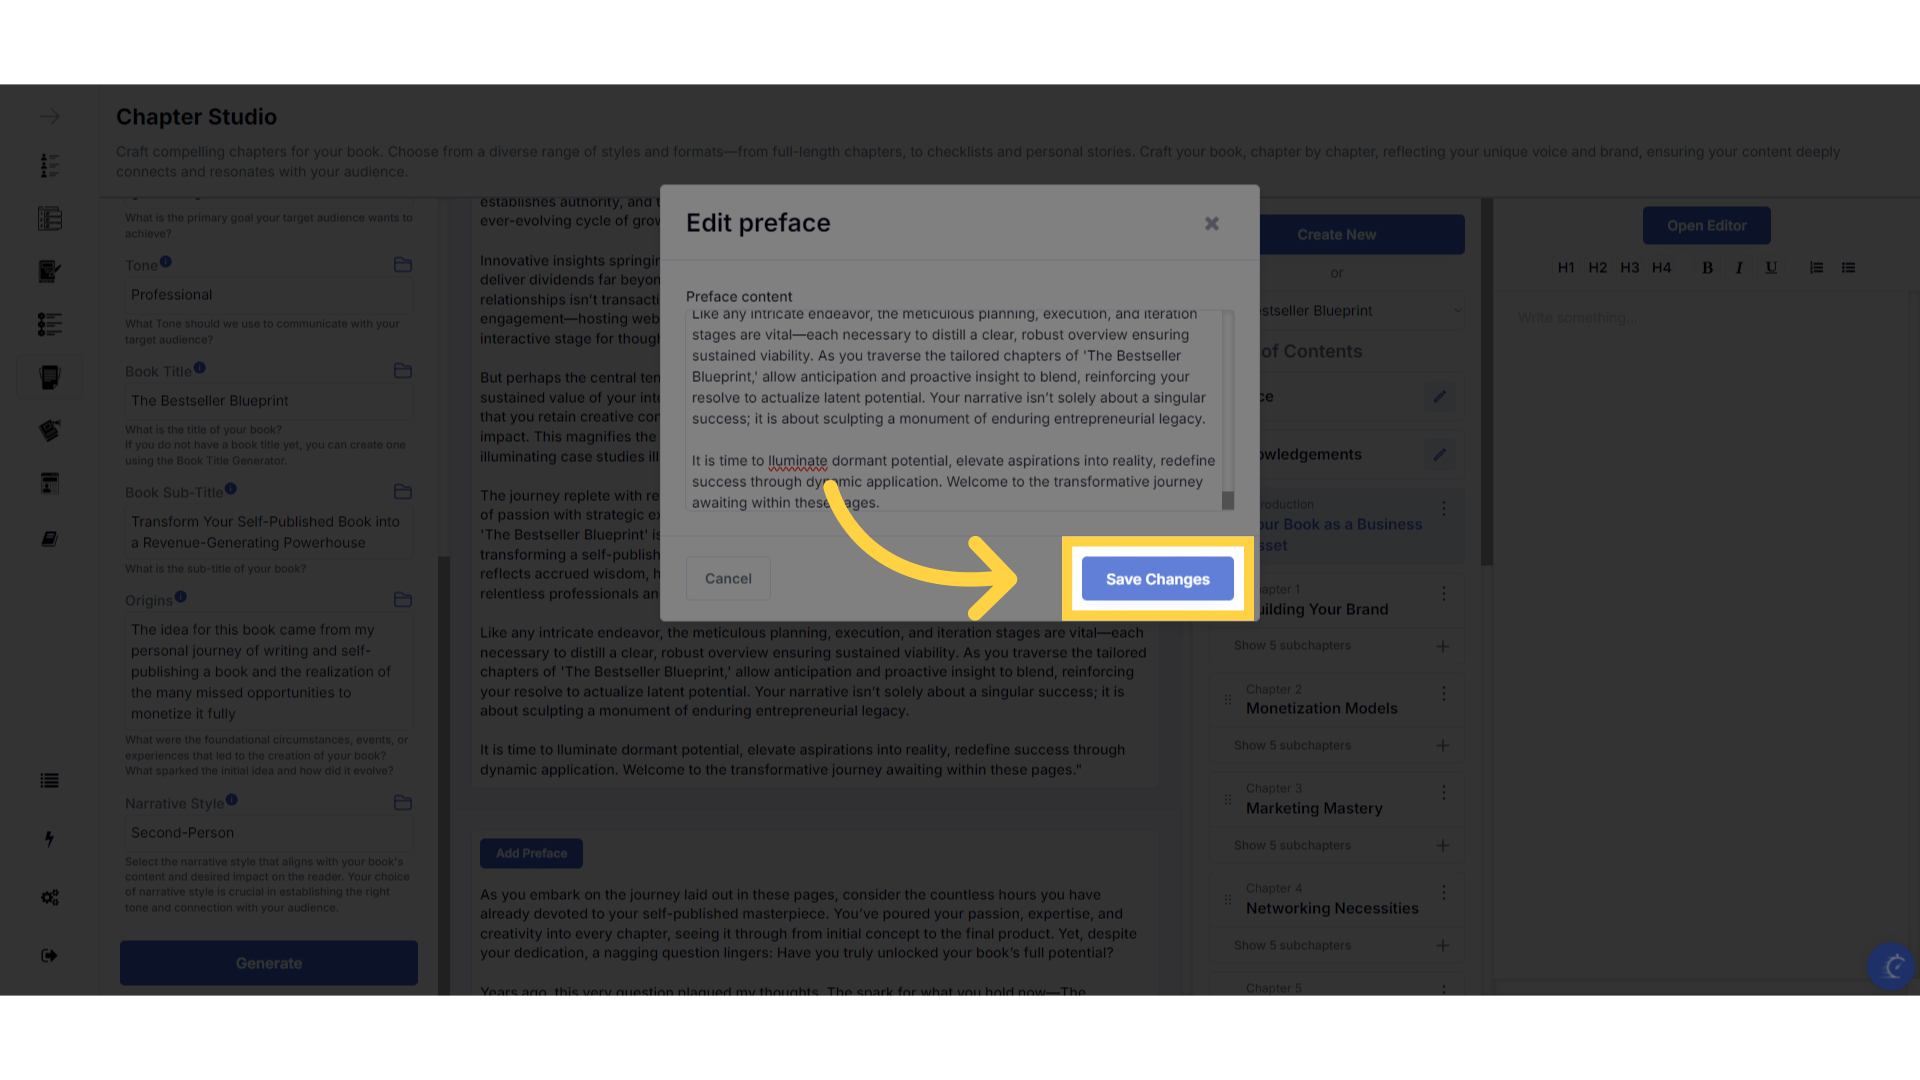
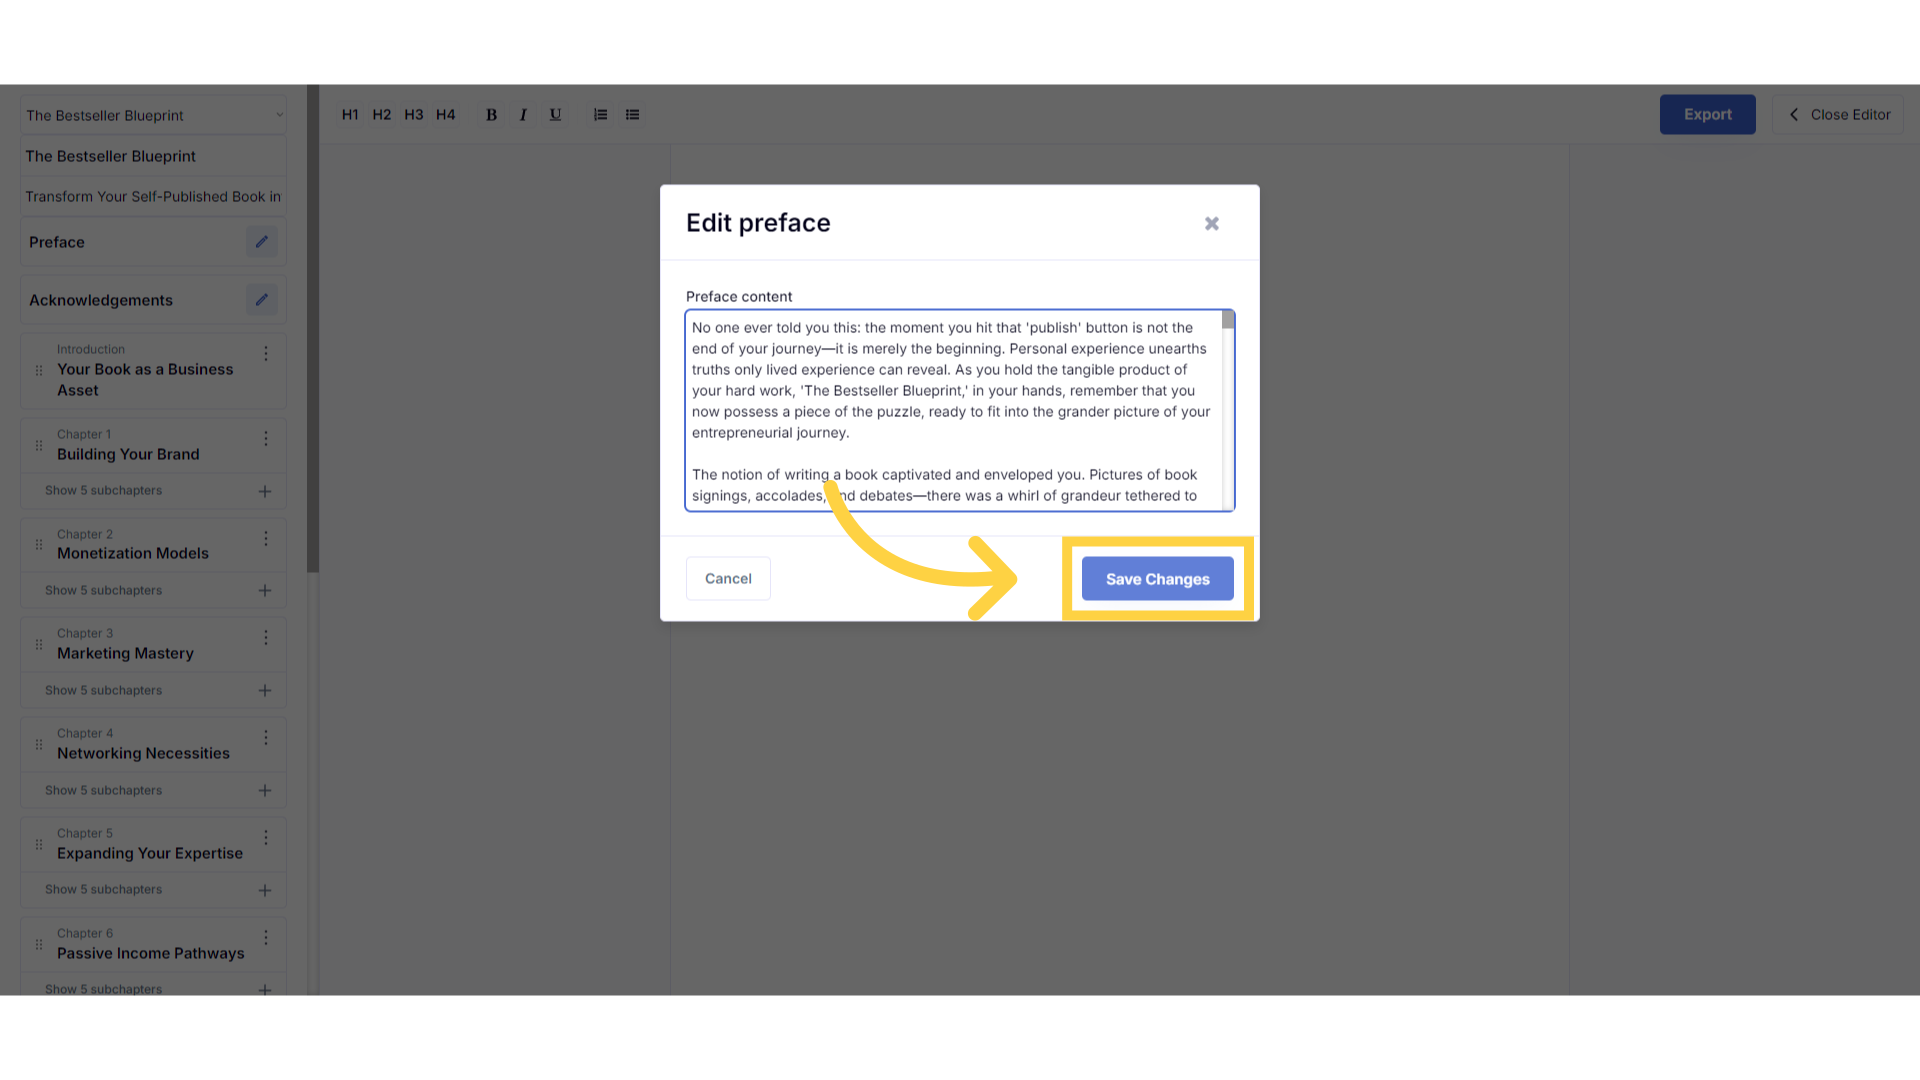
Click "edit" to open the Preface.
Click on the edit icon beside preface, to open the popup and edit or add content.
)
Paste the "Preface".
Paste your preface into the popup box. Alternatively, you can manually type and change this information.
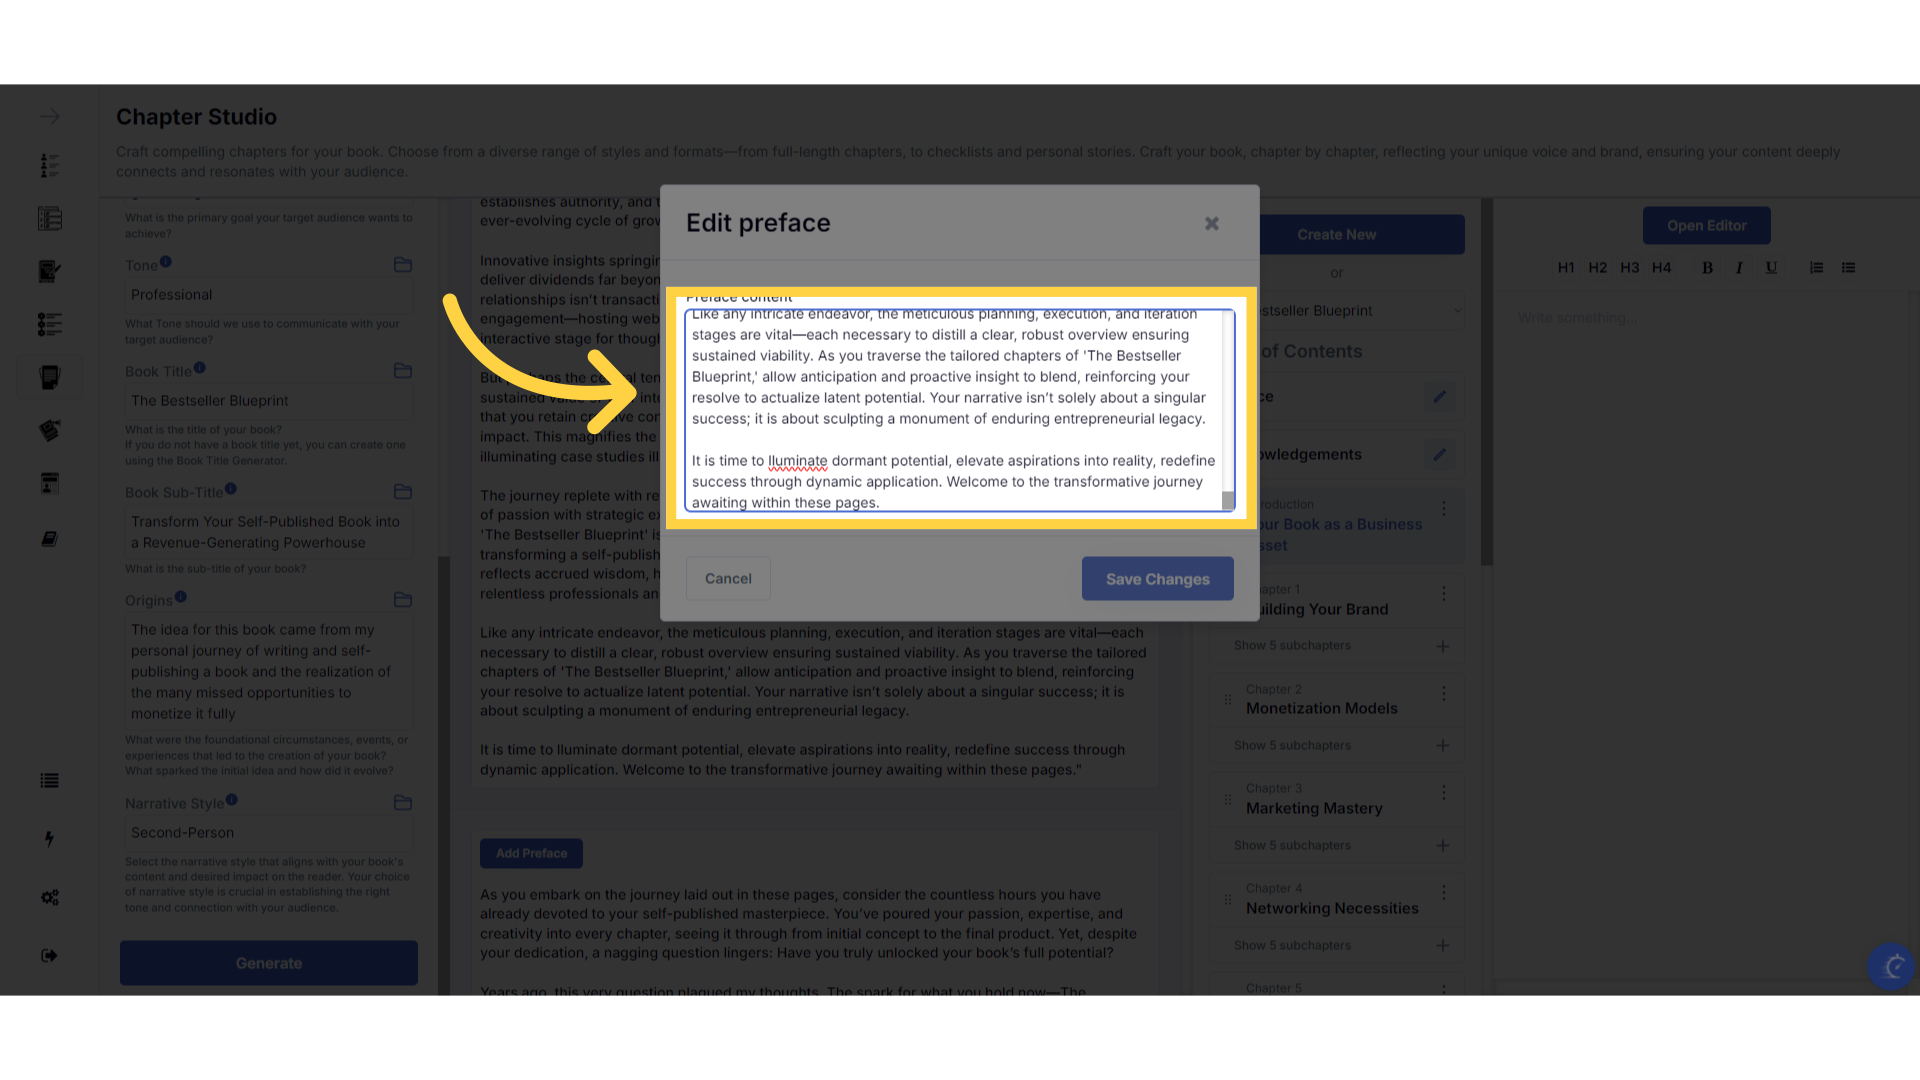)
Click "Save Changes"
Save the changes made to your preface.
)
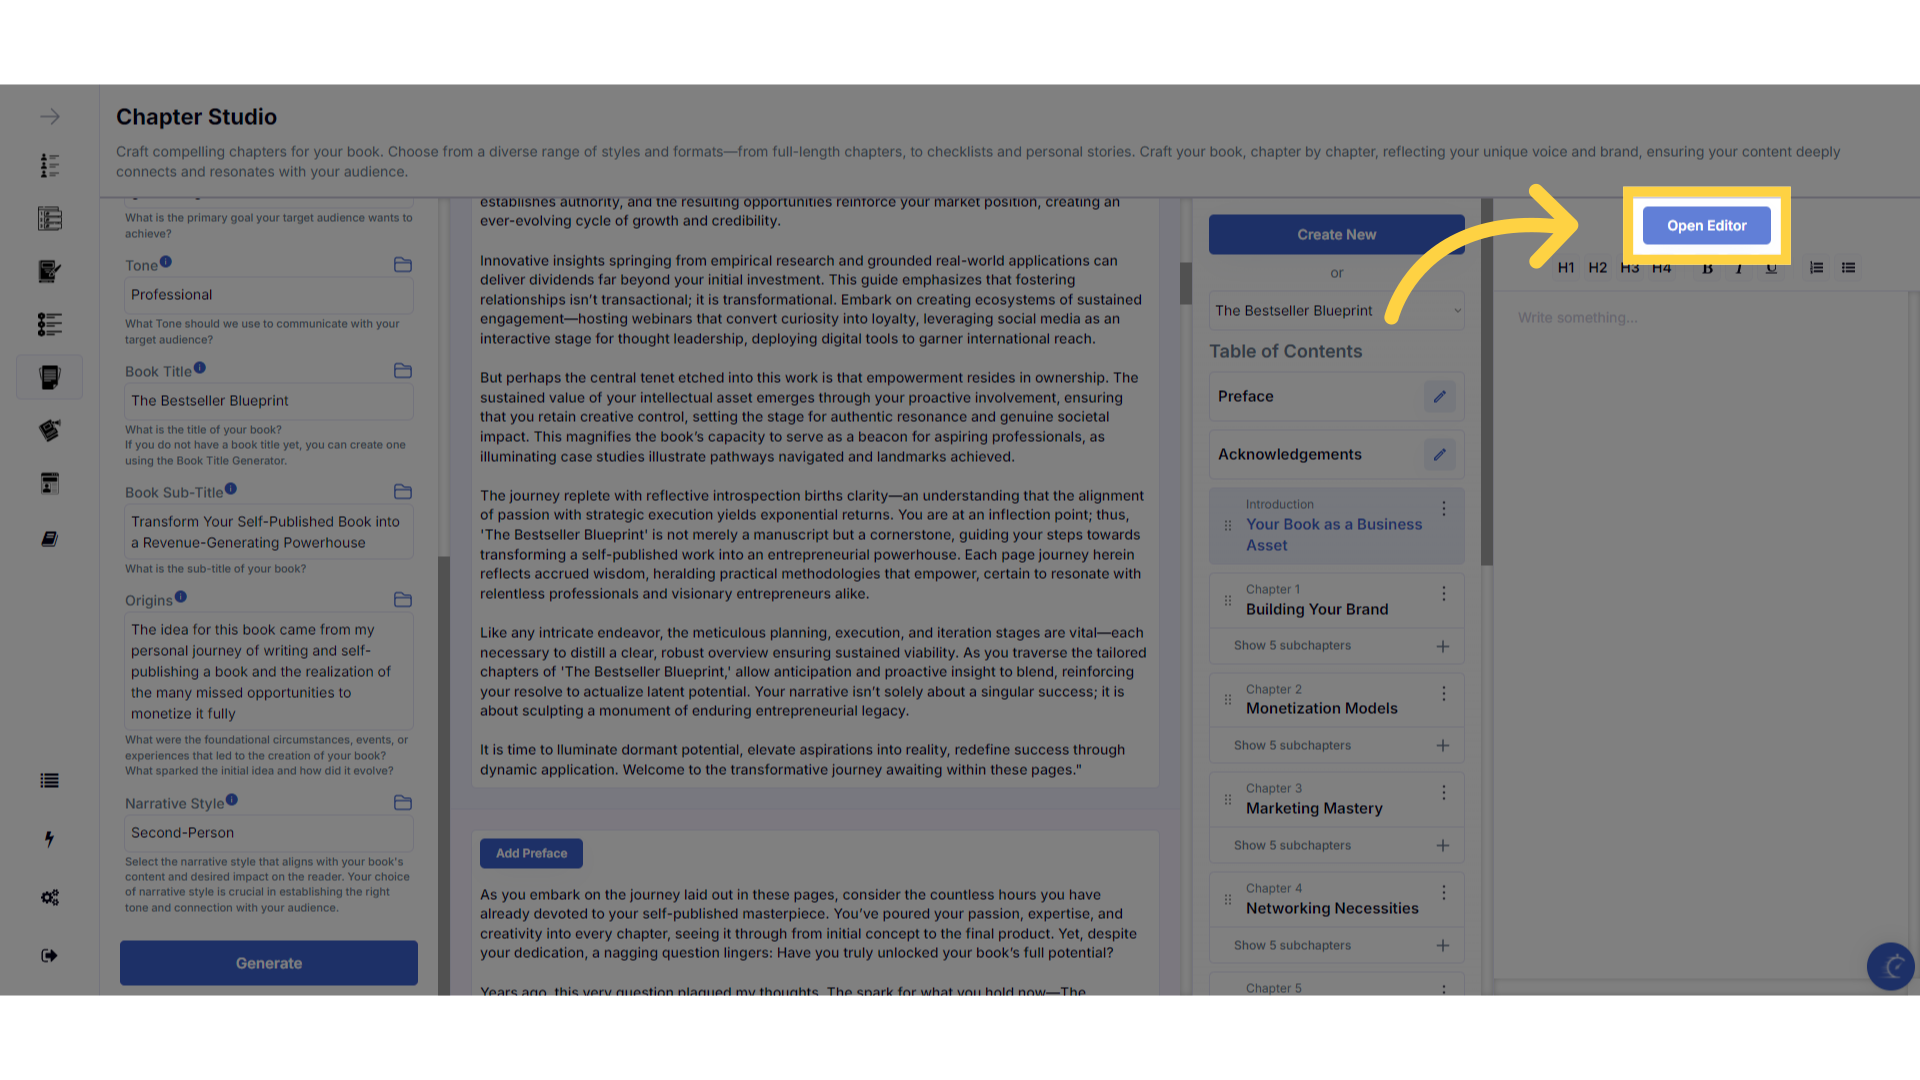
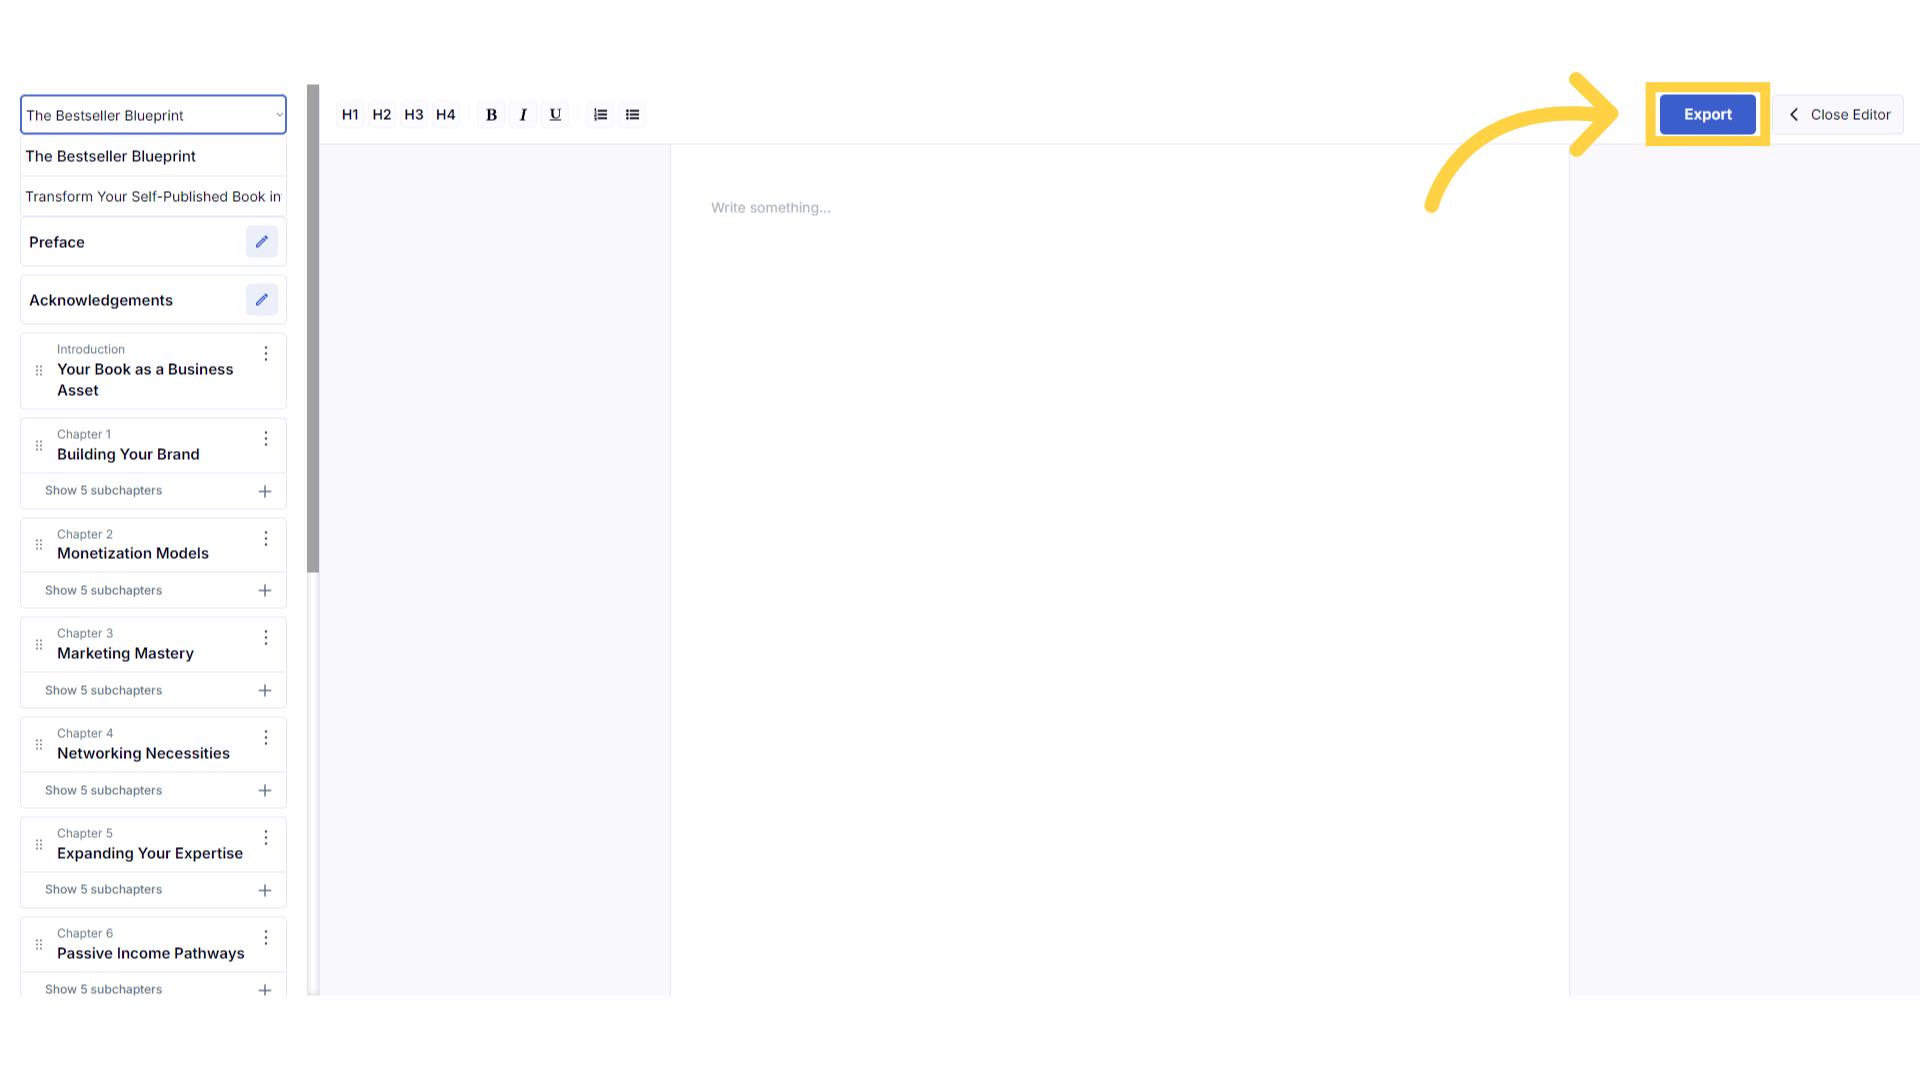
Click "Open Editor" to access your full book in editing mode to make changes or to export your book.
Click open editor to access your book in full screen editing mode and make changes. This is also where you will be able to export your formatted book.
)
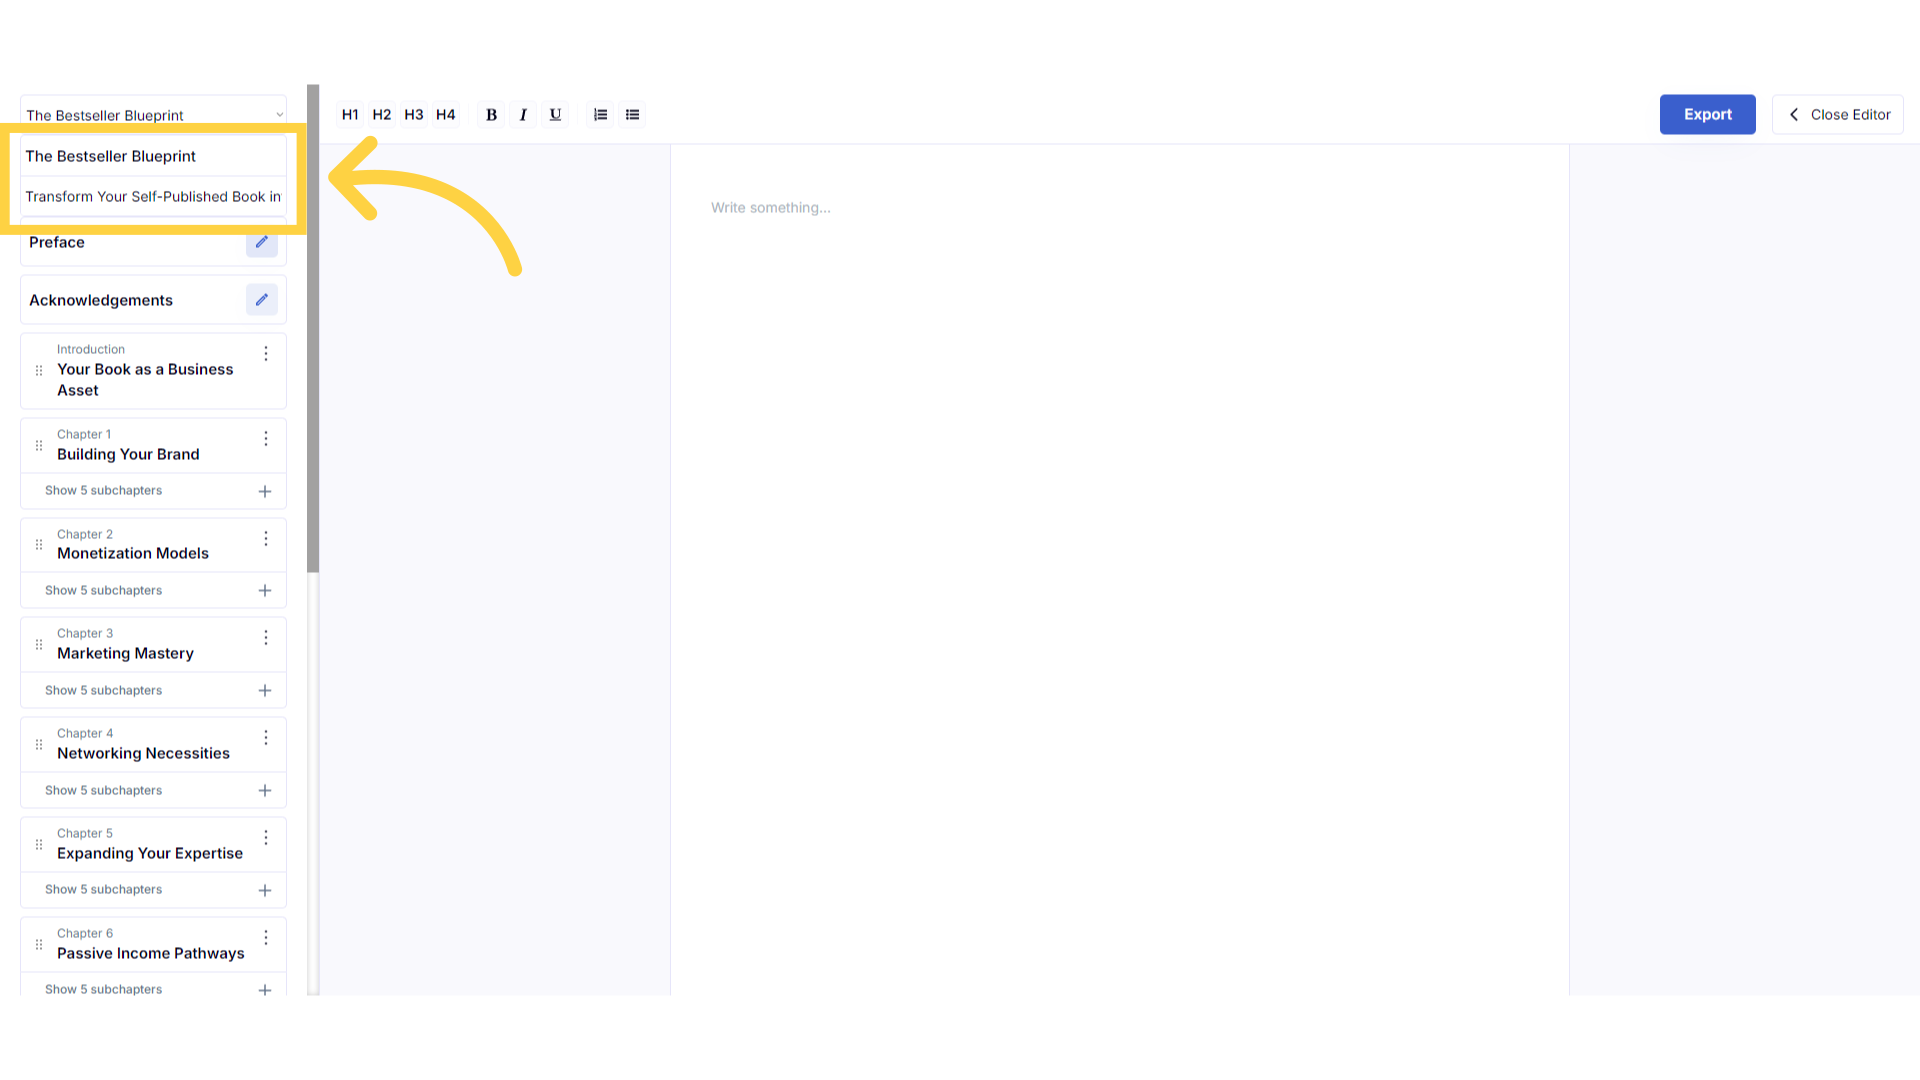
Edit your Book Title and Sub-Title.
While you are in full screen editing mode, you can click on your book title or book subtitle to make changes to the titles.
)
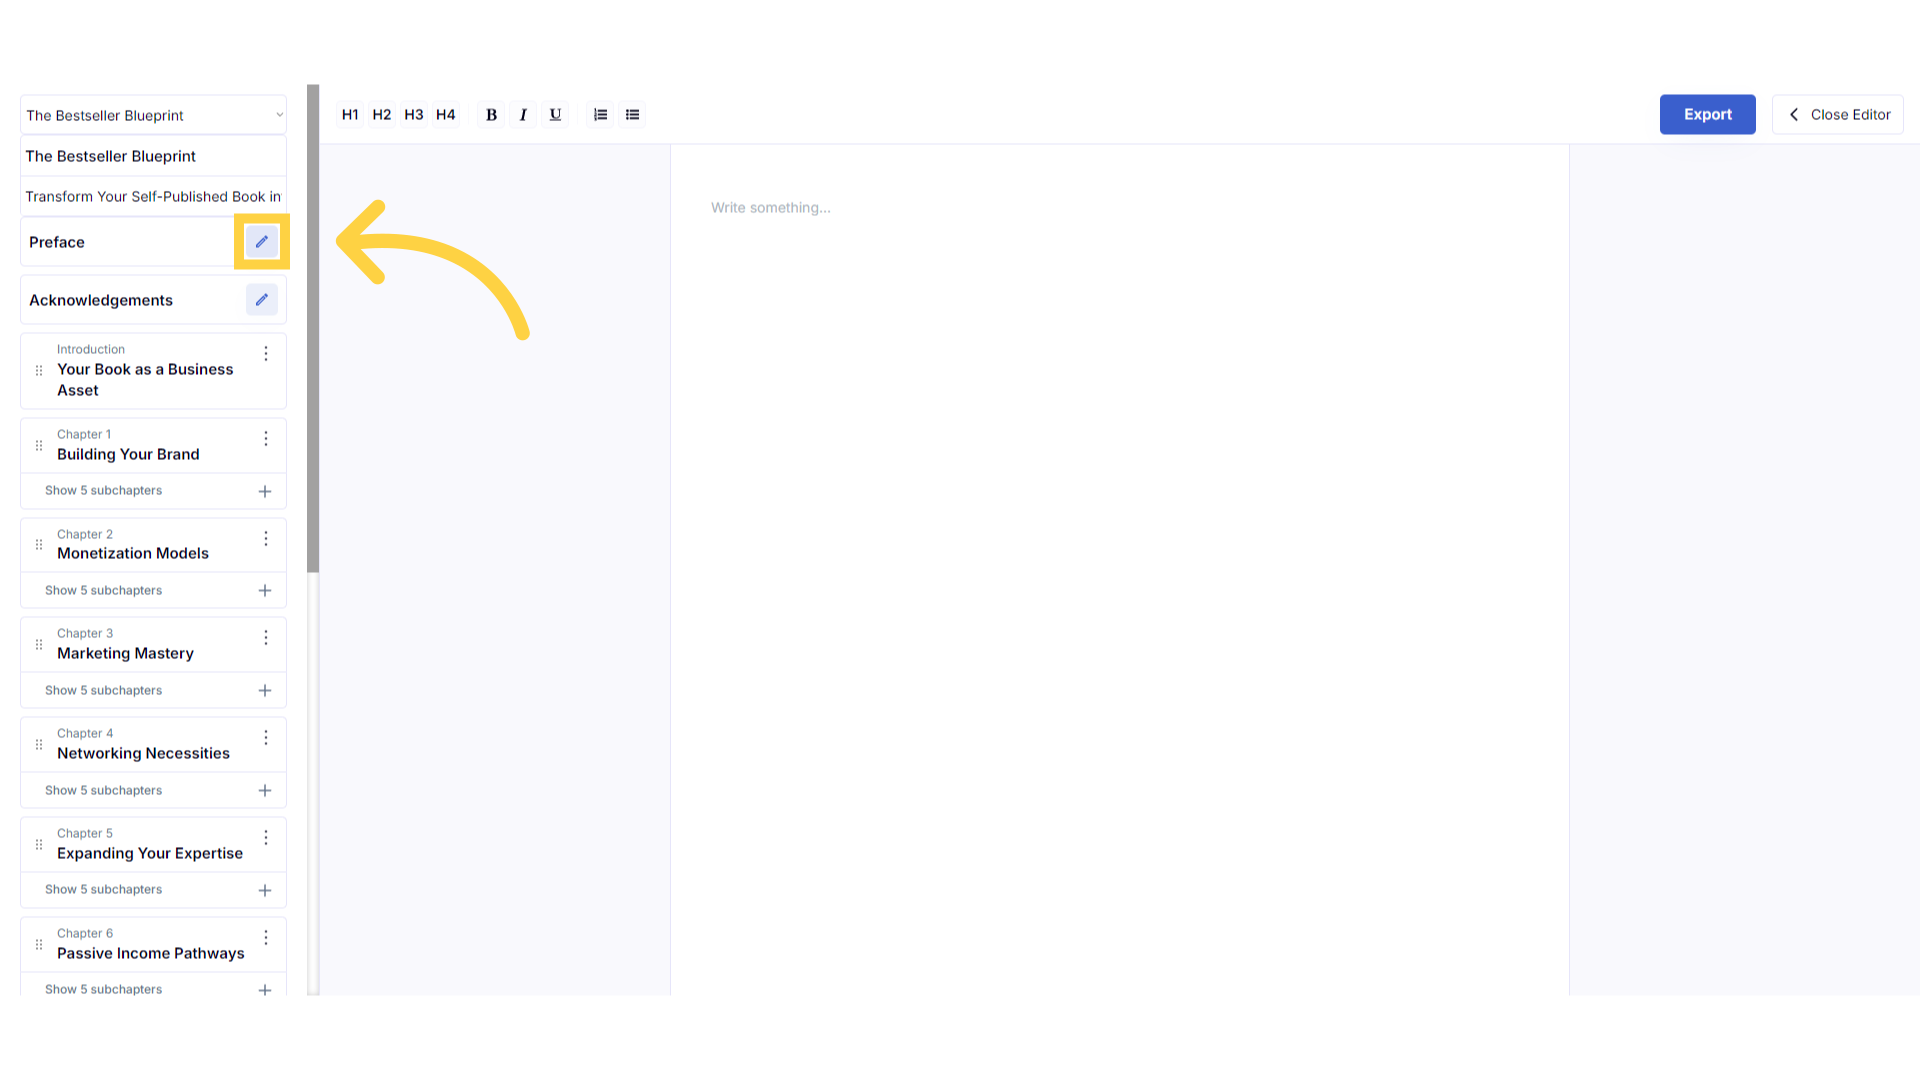
Click "edit" to change your Preface.
You can also edit your preface in the book editor by clicking the edit icon.
)
Click "Save Changes"
You can make changes manually, and then save your updated preface.
)
Click "Export" to download your book fully formatted in A4, US Letter or Paperback 6"x9".
When your book is complete, click export to download your book in Doc X format, to the download section on your device. If you don’t have Microsoft Word, you can use free alternatives like Google Docs, LibreOffice Writer, or Apache OpenOffice Writer, to open and edit your book. When exporting, you can choose one of three formats: A4, US Letter or Paperback 6"x9". After export, you can edit your book externally or send it to your editor. If you reach your monthly export limit, you can still generate and copy content within the book builder, then paste it into your existing exported document to continue making changes without needing to export your book again.
)
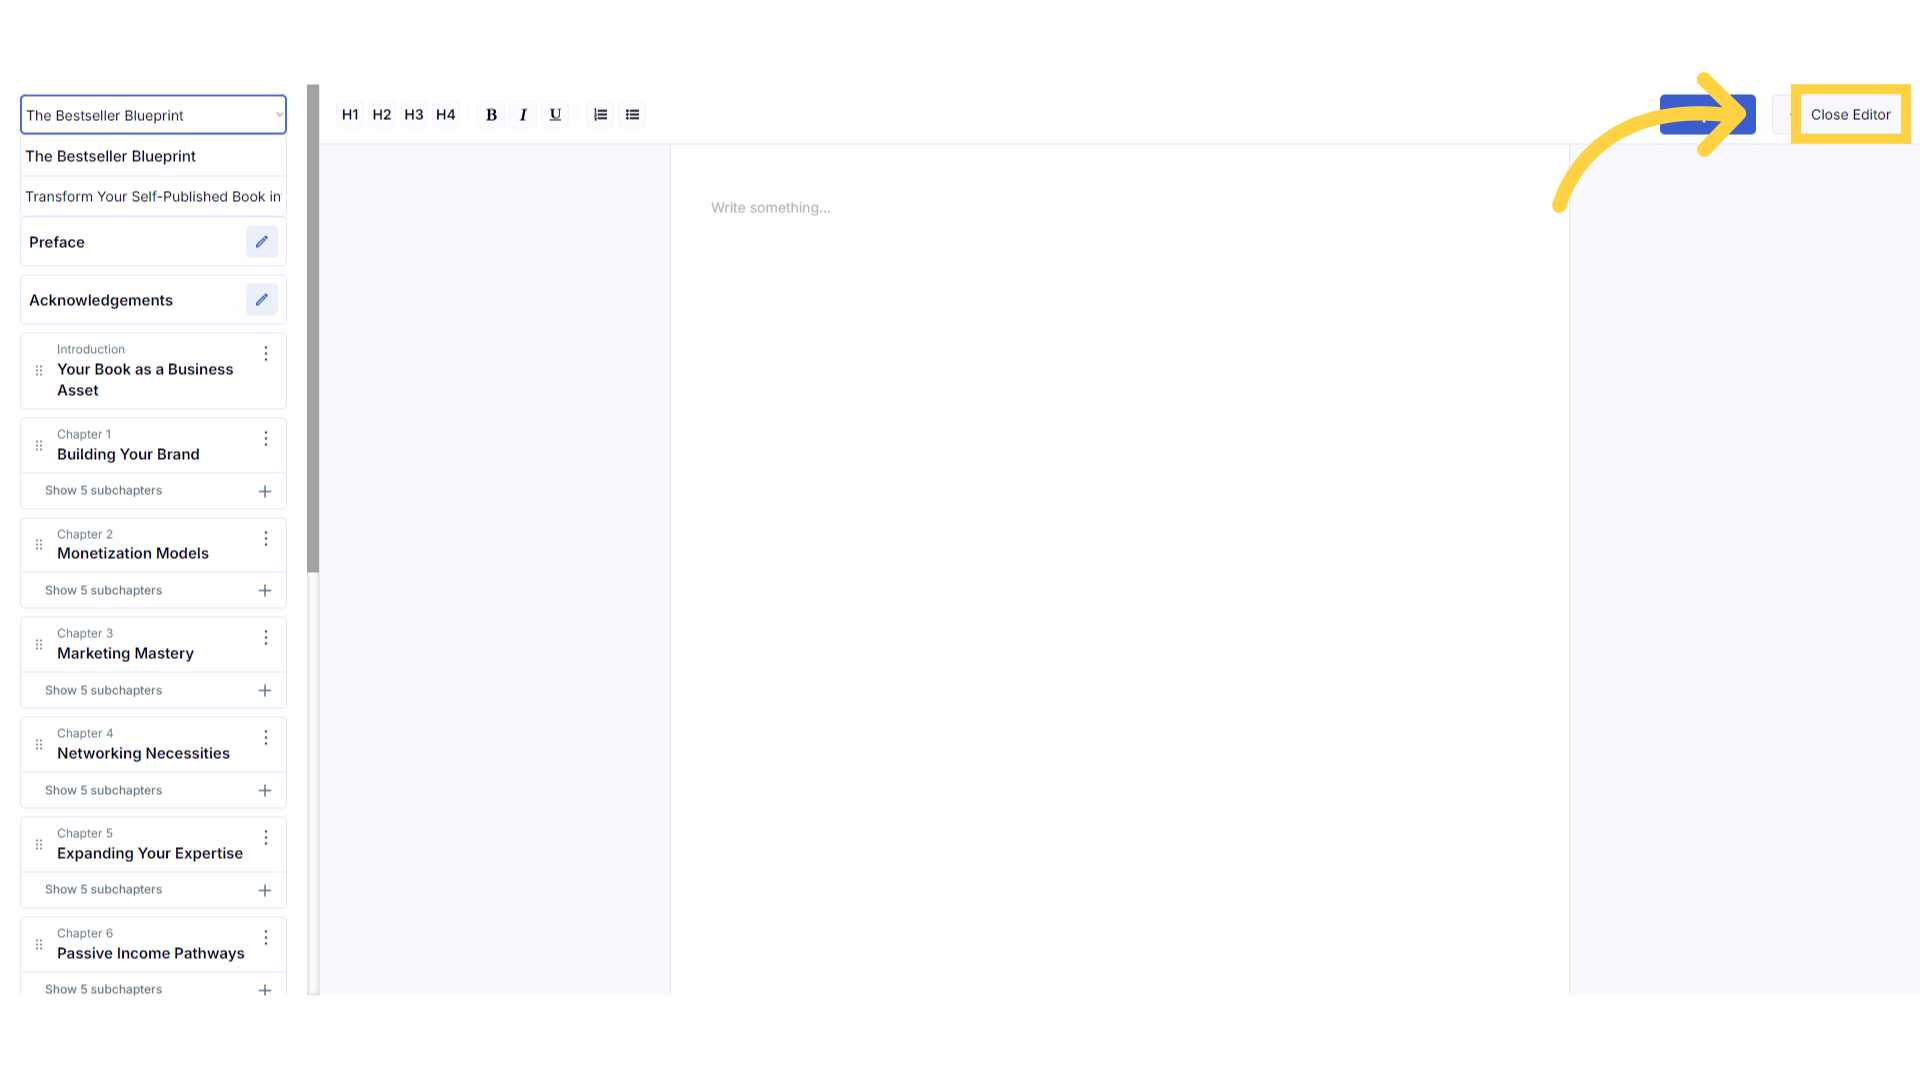
Click "Close Editor" to return to your book and generate different content.
Click on close editor to return to the book builder and continue to generate content.
)
Refresh your browser to reset the dashboard if you are having technical issues.
If you are having a technical issue, refresh the website browser and try again. This usually fixes any issues.
)
Click the blue icon at the bottom right of your screen.
You can access the help center, tutorials and support by clicking on the icon at the bottom right of your screen.
)
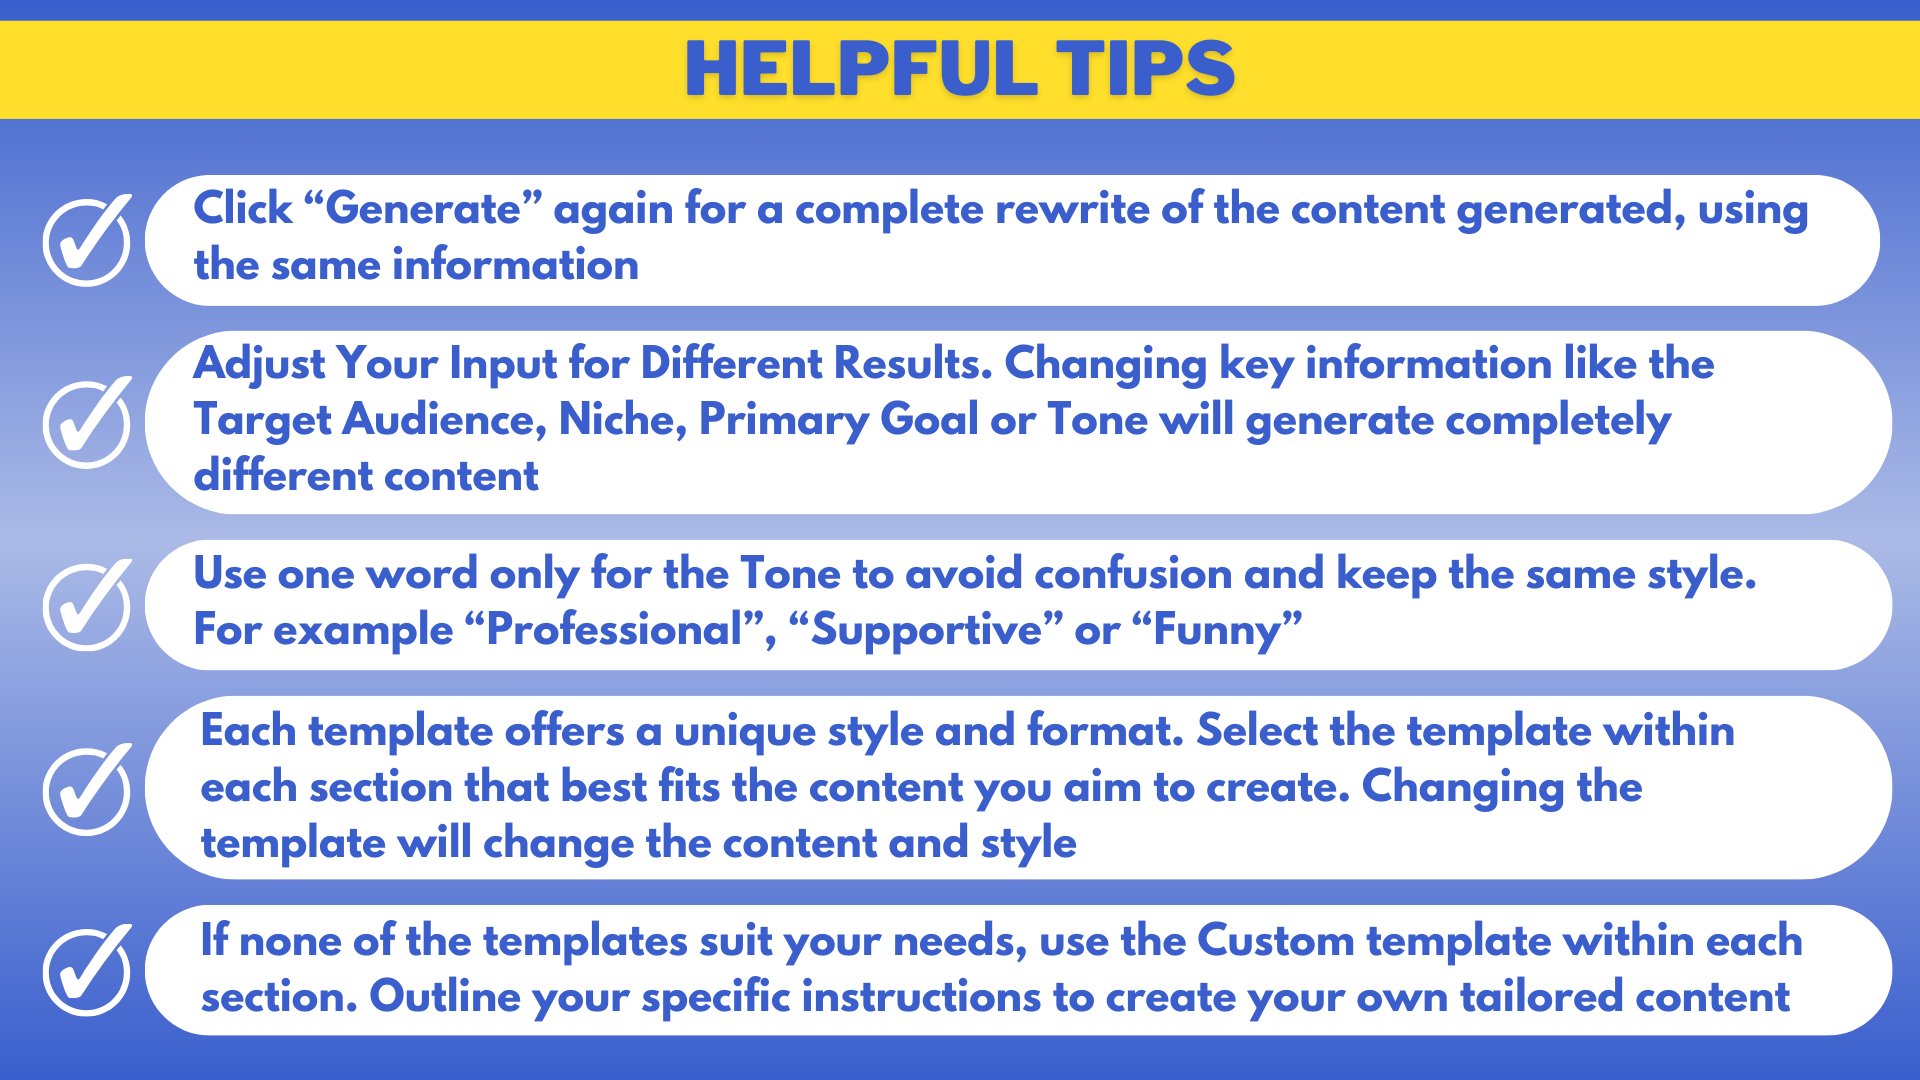
Here are some helpful tips to help you craft your book.
Here are some helpful tips. You can experiment with different information to craft perfectly aligned content.